

Where your customers check out — the kurnl marketplace or your own store —
is set under Billing → Checkout & Integrations; see Checkout.
Payments (Stripe)
Payments from your customers go straight to your Stripe account. You paste one restricted key; kurnl checks it and sets up the webhook in your account — there is nothing else to configure at Stripe.1
Create a restricted key at Stripe
In your Stripe dashboard, go to Developers → API keys → Create restricted
key and give it these permissions, all write: Checkout Sessions,
Customers, PaymentIntents, SetupIntents, PaymentMethods, Refunds and
Webhook Endpoints.
2
Connect it
In Settings → ISP Profile, tab Integrations, paste the key into
Restricted key on the Payments (Stripe) card and press
Connect Stripe. The dashboard accepts a live key (
rk_live_…); test
environments take a test-mode key (rk_test_…).3
Check the connection
The card shows your Account, the Mode (Live or Test), whether the
Webhook is active, and when you Connected.
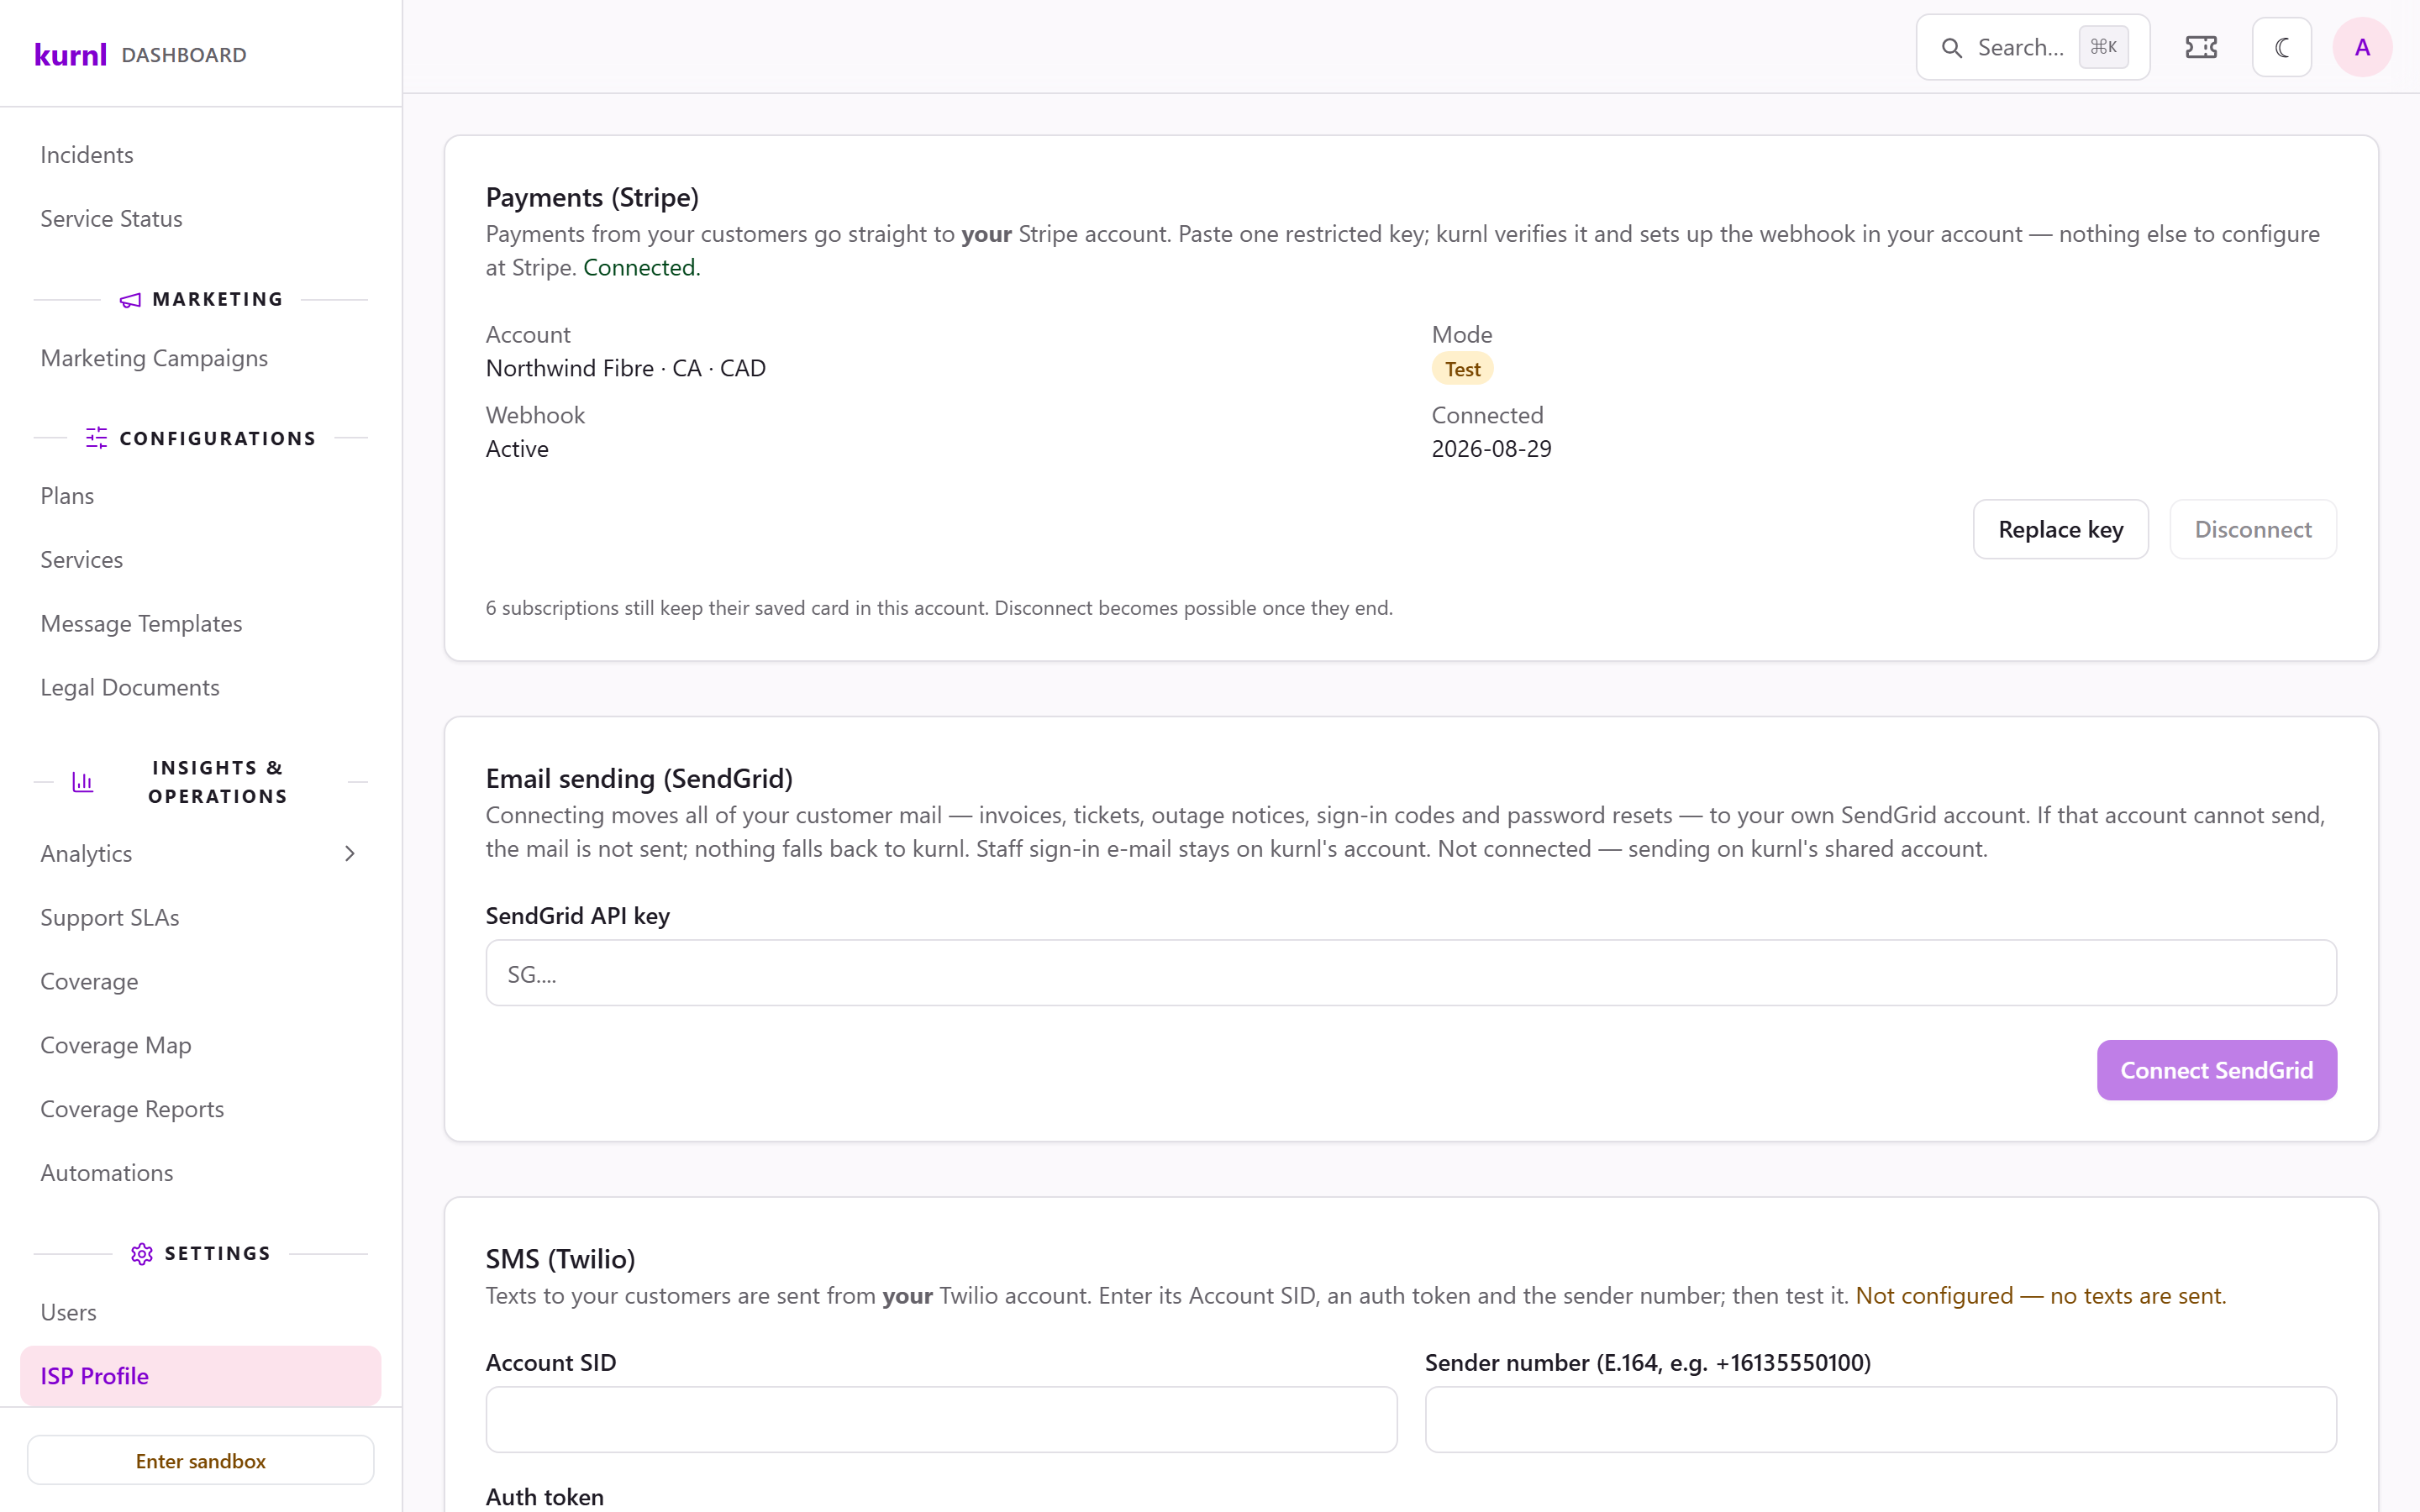
Payments (Stripe), connected
Email sending (SendGrid)
By default, e-mail to your customers goes out through kurnl’s shared account. Connect your own SendGrid account and all of it — invoices, tickets, outage notices, sign-in codes and password resets — is sent from your verified addresses. E-mail to your staff (their sign-in codes and invitations) always comes from kurnl.1
Verify a sender at SendGrid
Authenticate a domain or verify a single sender address in your SendGrid
account. An account with nothing verified cannot be connected.
2
Connect it
Create a SendGrid API key with Mail Send permission and paste it into
SendGrid API key on the Email sending (SendGrid) card, then press
Connect SendGrid. If the key cannot list your verified senders, the card
asks for your Sending domain instead.
3
Choose your From addresses
Under Sender roles, pick the default From address for Billing,
Orders, Support and Status / outage e-mail, then Save sender
roles. A role left unset uses your first verified address. Single message
templates can override it under Configurations → Message Templates.
SMS (Twilio)
Texts to your customers are sent from your Twilio account. On the SMS (Twilio) card, enter the Account SID, the Sender number (in international format, e.g. +16135550100) and the Auth token, then Save SMS settings. Send a test text checks the connection. Until it is configured, no texts are sent. Only your admin can change these settings; your other staff see them read-only.Backup notification e-mail
If your own system receives kurnl’s webhooks for anonymous lines, you can also get each event by e-mail. Open Billing → Checkout & Integrations, enter an address under Backup notification e-mail and Save. It is a safety net for a missed webhook, and it works without a webhook URL. The mails come from kurnl’s status address and cover anonymous lines only. Send notification e-mails switches them off without deleting the address. See Checkout.Partner API keys
Partner API keys let your own systems — a web shop, a billing export — use kurnl’s API. You can hold up to 10 active keys, each with its own label and scopes.1
Create a key
In Settings → API Key, press New key, give it a Label and only
the Scopes the integration needs, then Create key.
2
Copy it now
The full key is shown once. Copy it and store it securely — it cannot
be shown again.
3
Rotate without downtime
Create a new key, switch your integration to it, then Revoke the old
one. Last used shows whether a key is still in service. A revoked key
stops working within about five minutes.
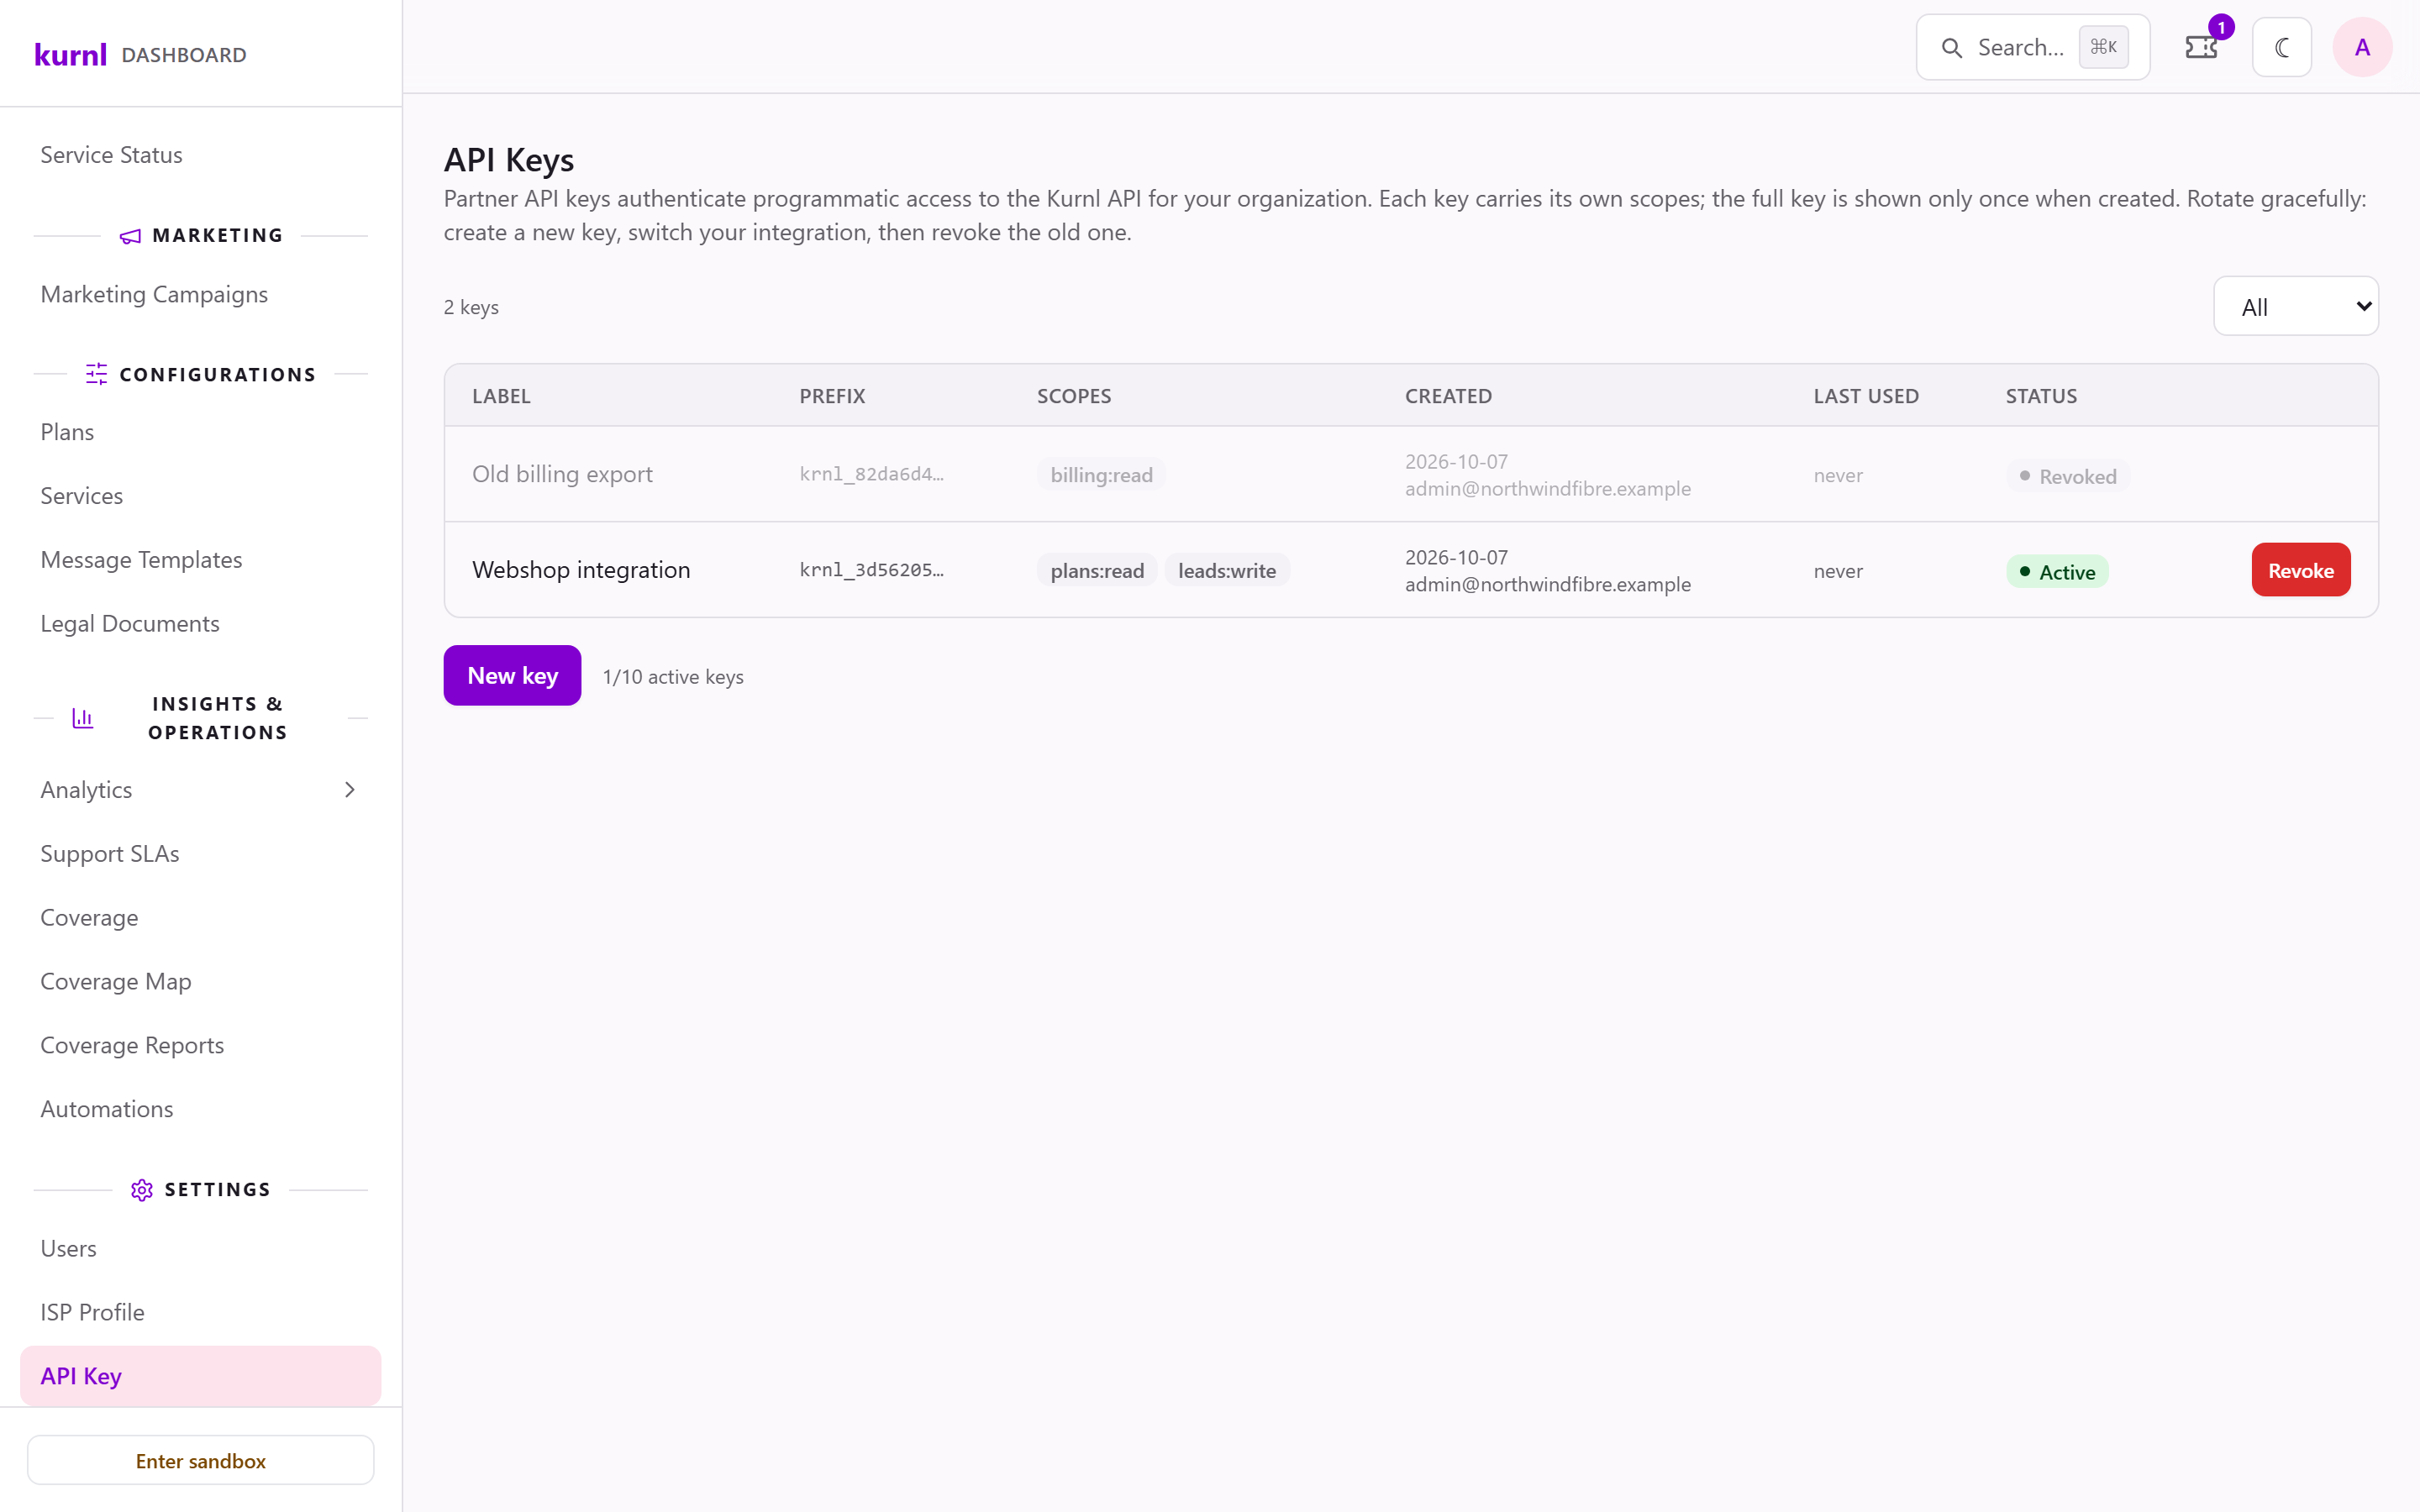
Partner API keys
Your team (staff accounts)
Your admin account invites colleagues and decides what each of them can do. Only the admin account sees Settings → Users.1
Invite a colleague
In Settings → Users, press + Invite User, enter the Email and a
Staff role, then Send Invite. The invitation link is valid for
72 hours; until it is accepted, the user shows as Invite pending.
2
Choose the right role
- sp_admin — full access: staff and their change history, billing, tax, plans, services, network, campaigns, reports and the sandbox (kurnl runs the technician visits; where the customer books the visit, sp_admin and support can book, move or cancel it for them and send the booking link again)
- support — subscribers (including plan changes, moving a customer to another provider and reactivation), tickets and support SLAs, network, invoices, plans and services (view only), resending an invoice or a customer’s e-mail, and the technician visits on the customer page (booking, moving or cancelling a visit the customer books themselves, and sending the booking link again)
- sales — subscribers and support SLAs (view only), plans, services (view only), campaigns, and the abandoned checkouts on Leads
- bookkeeping — billing, tax and the DATEV export, invoices (including Resend), refunds, reports (no customer pages)
3
Deactivate when someone leaves
Deactivate stops the user from signing in; the account stays listed and
can be reactivated. Staff history below the list records every change.
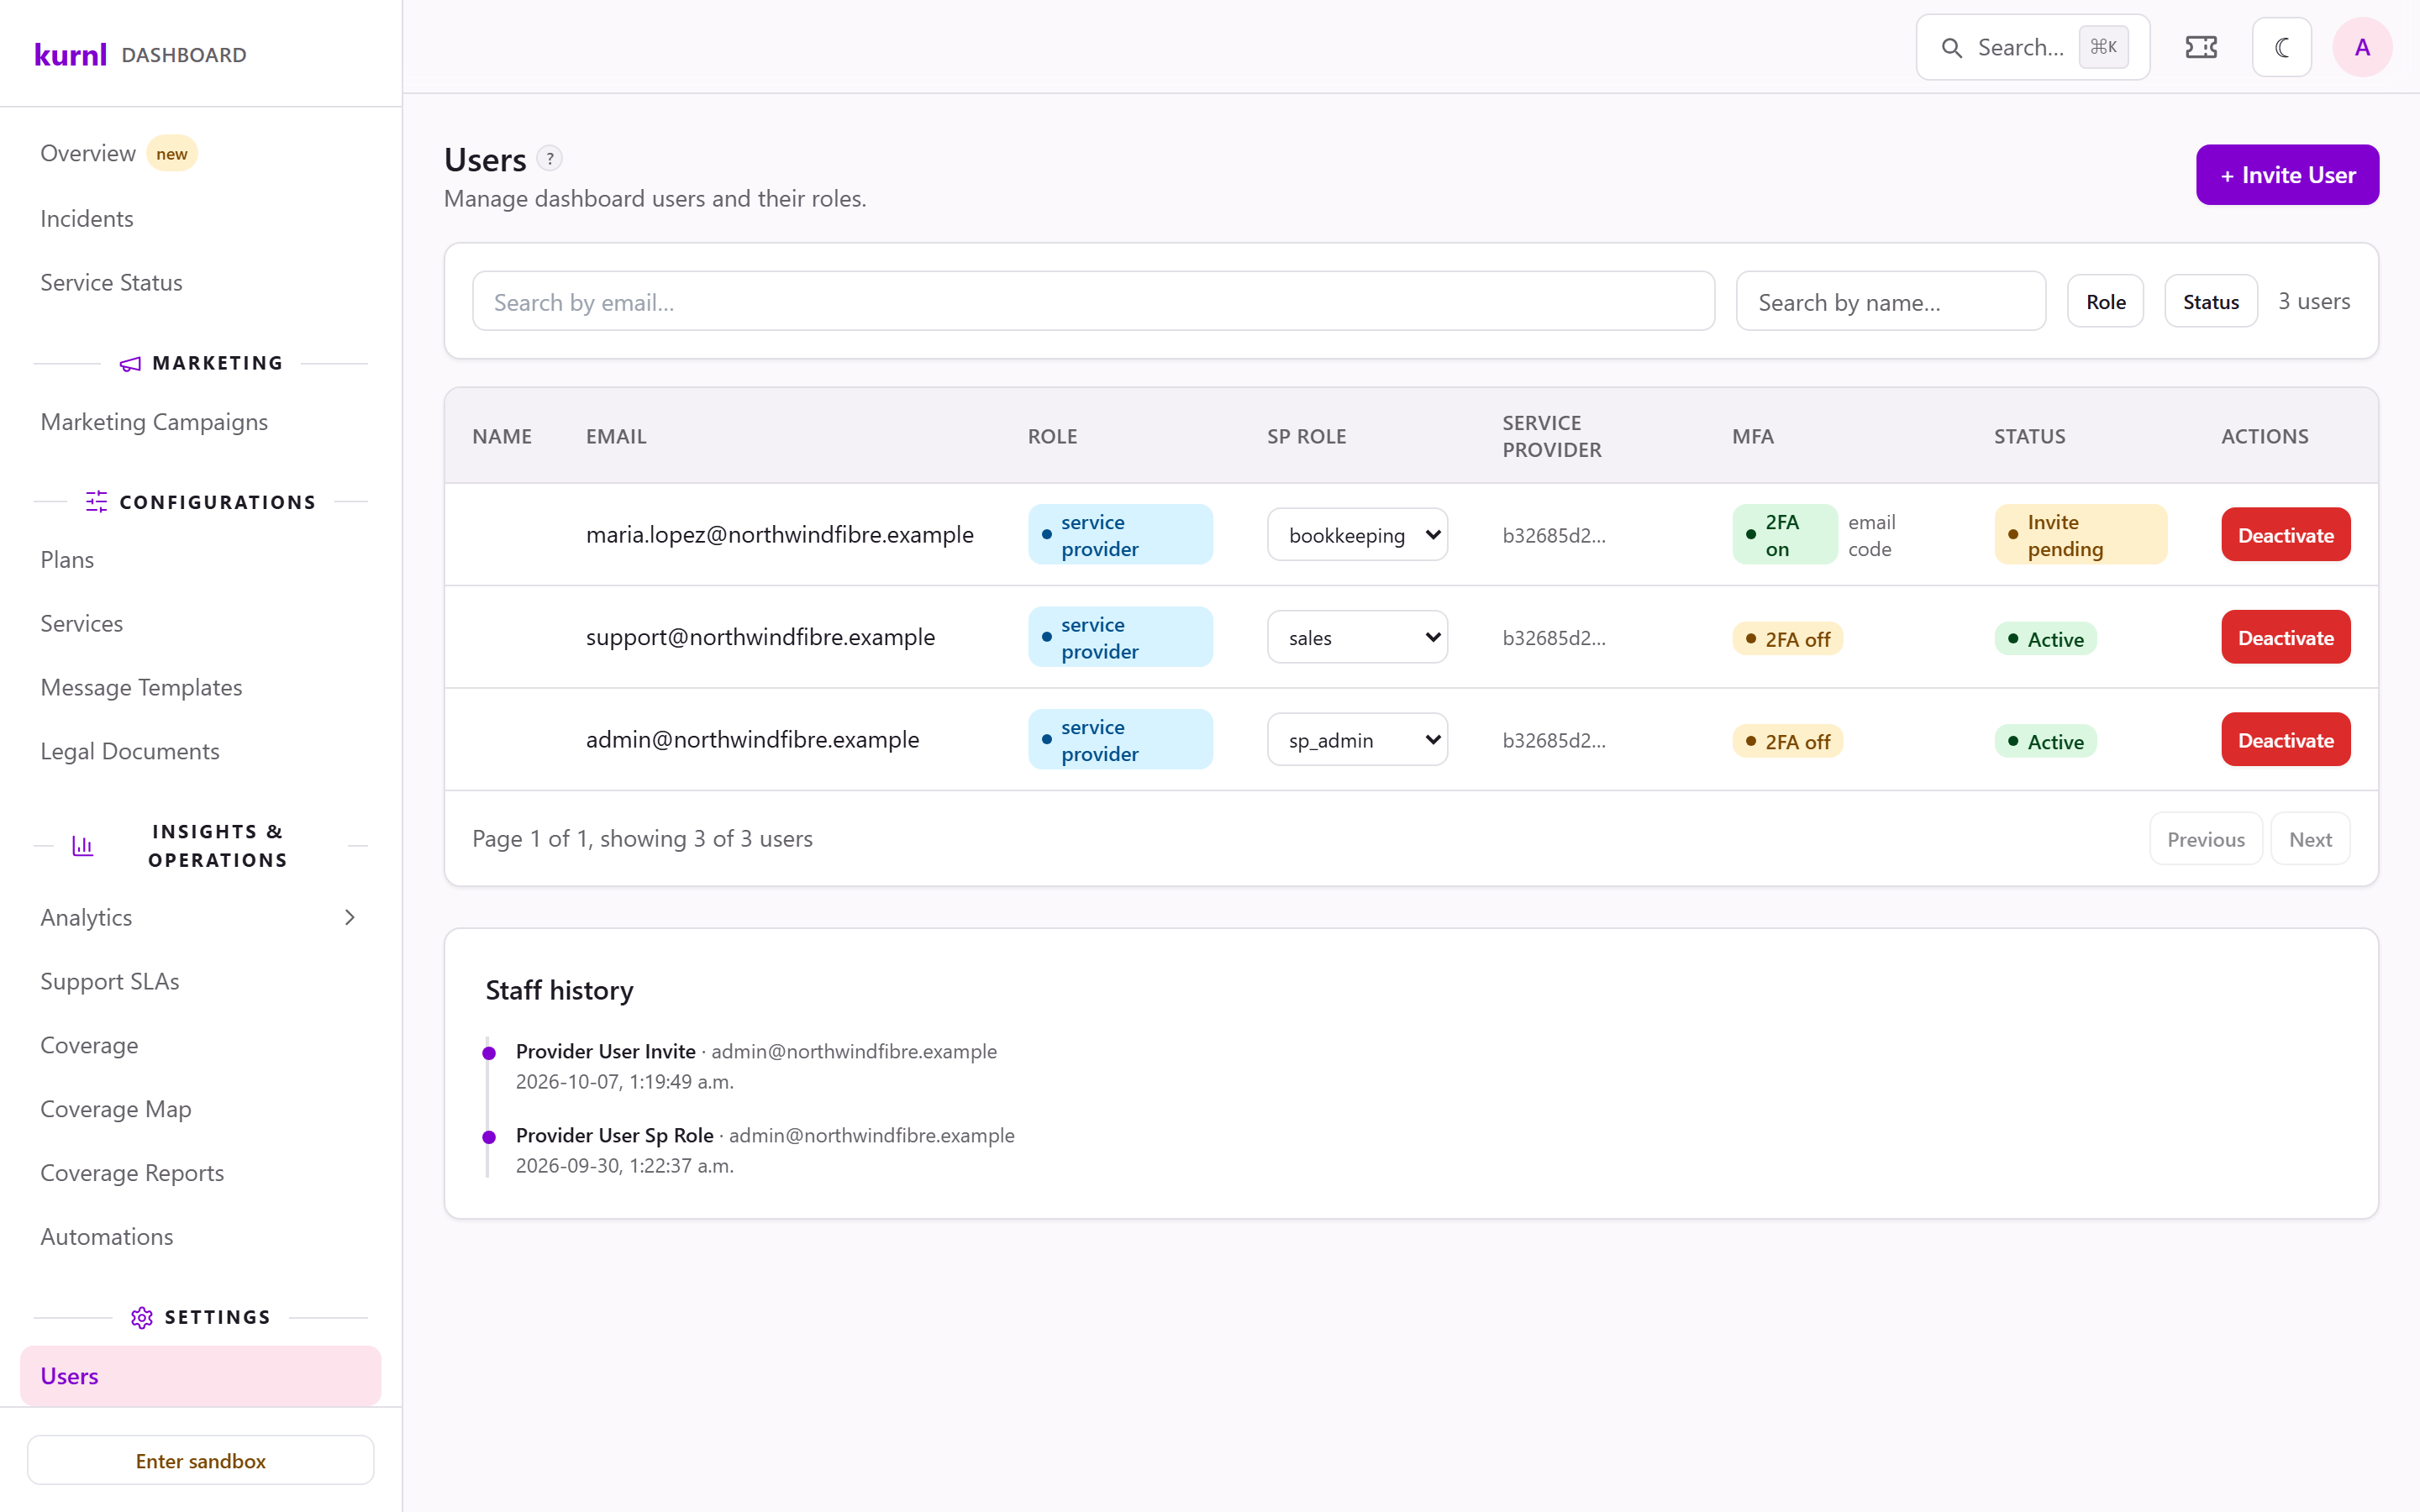
Your staff
Two-factor sign-in
Every staff account signs in in two steps: the password, then a code. This applies to each of your colleagues, not only the admin.- Without an authenticator app, the code arrives by e-mail at every sign-in.
- With an authenticator app, the code comes from the app. Set it up under Profile (the round account button, top right) → Two-Factor Authentication → Enable 2FA: scan the QR code, enter the app’s code, and save the ten backup codes shown next. They are shown only once. Once the app is set up, sign-in no longer offers the e-mail code.
1
Lost your phone
At the code step, choose Use a backup code instead and enter one of your
backup codes. Each backup code works once.
2
Remove the old authenticator
In Profile → Two-Factor Authentication, choose Lost your
authenticator? Remove it and confirm with another backup code. Sign-in
then uses the e-mail code again, and you can set up the app on your new
phone.
3
Keep codes in reserve
The card shows how many backup codes are left. Generate new codes
(confirmed with a code from the app or a backup code) replaces the whole
set; the old codes stop working.
No phone and no backup codes left? Ask kurnl to reset your two-factor
sign-in. Your admin cannot reset it for you.