

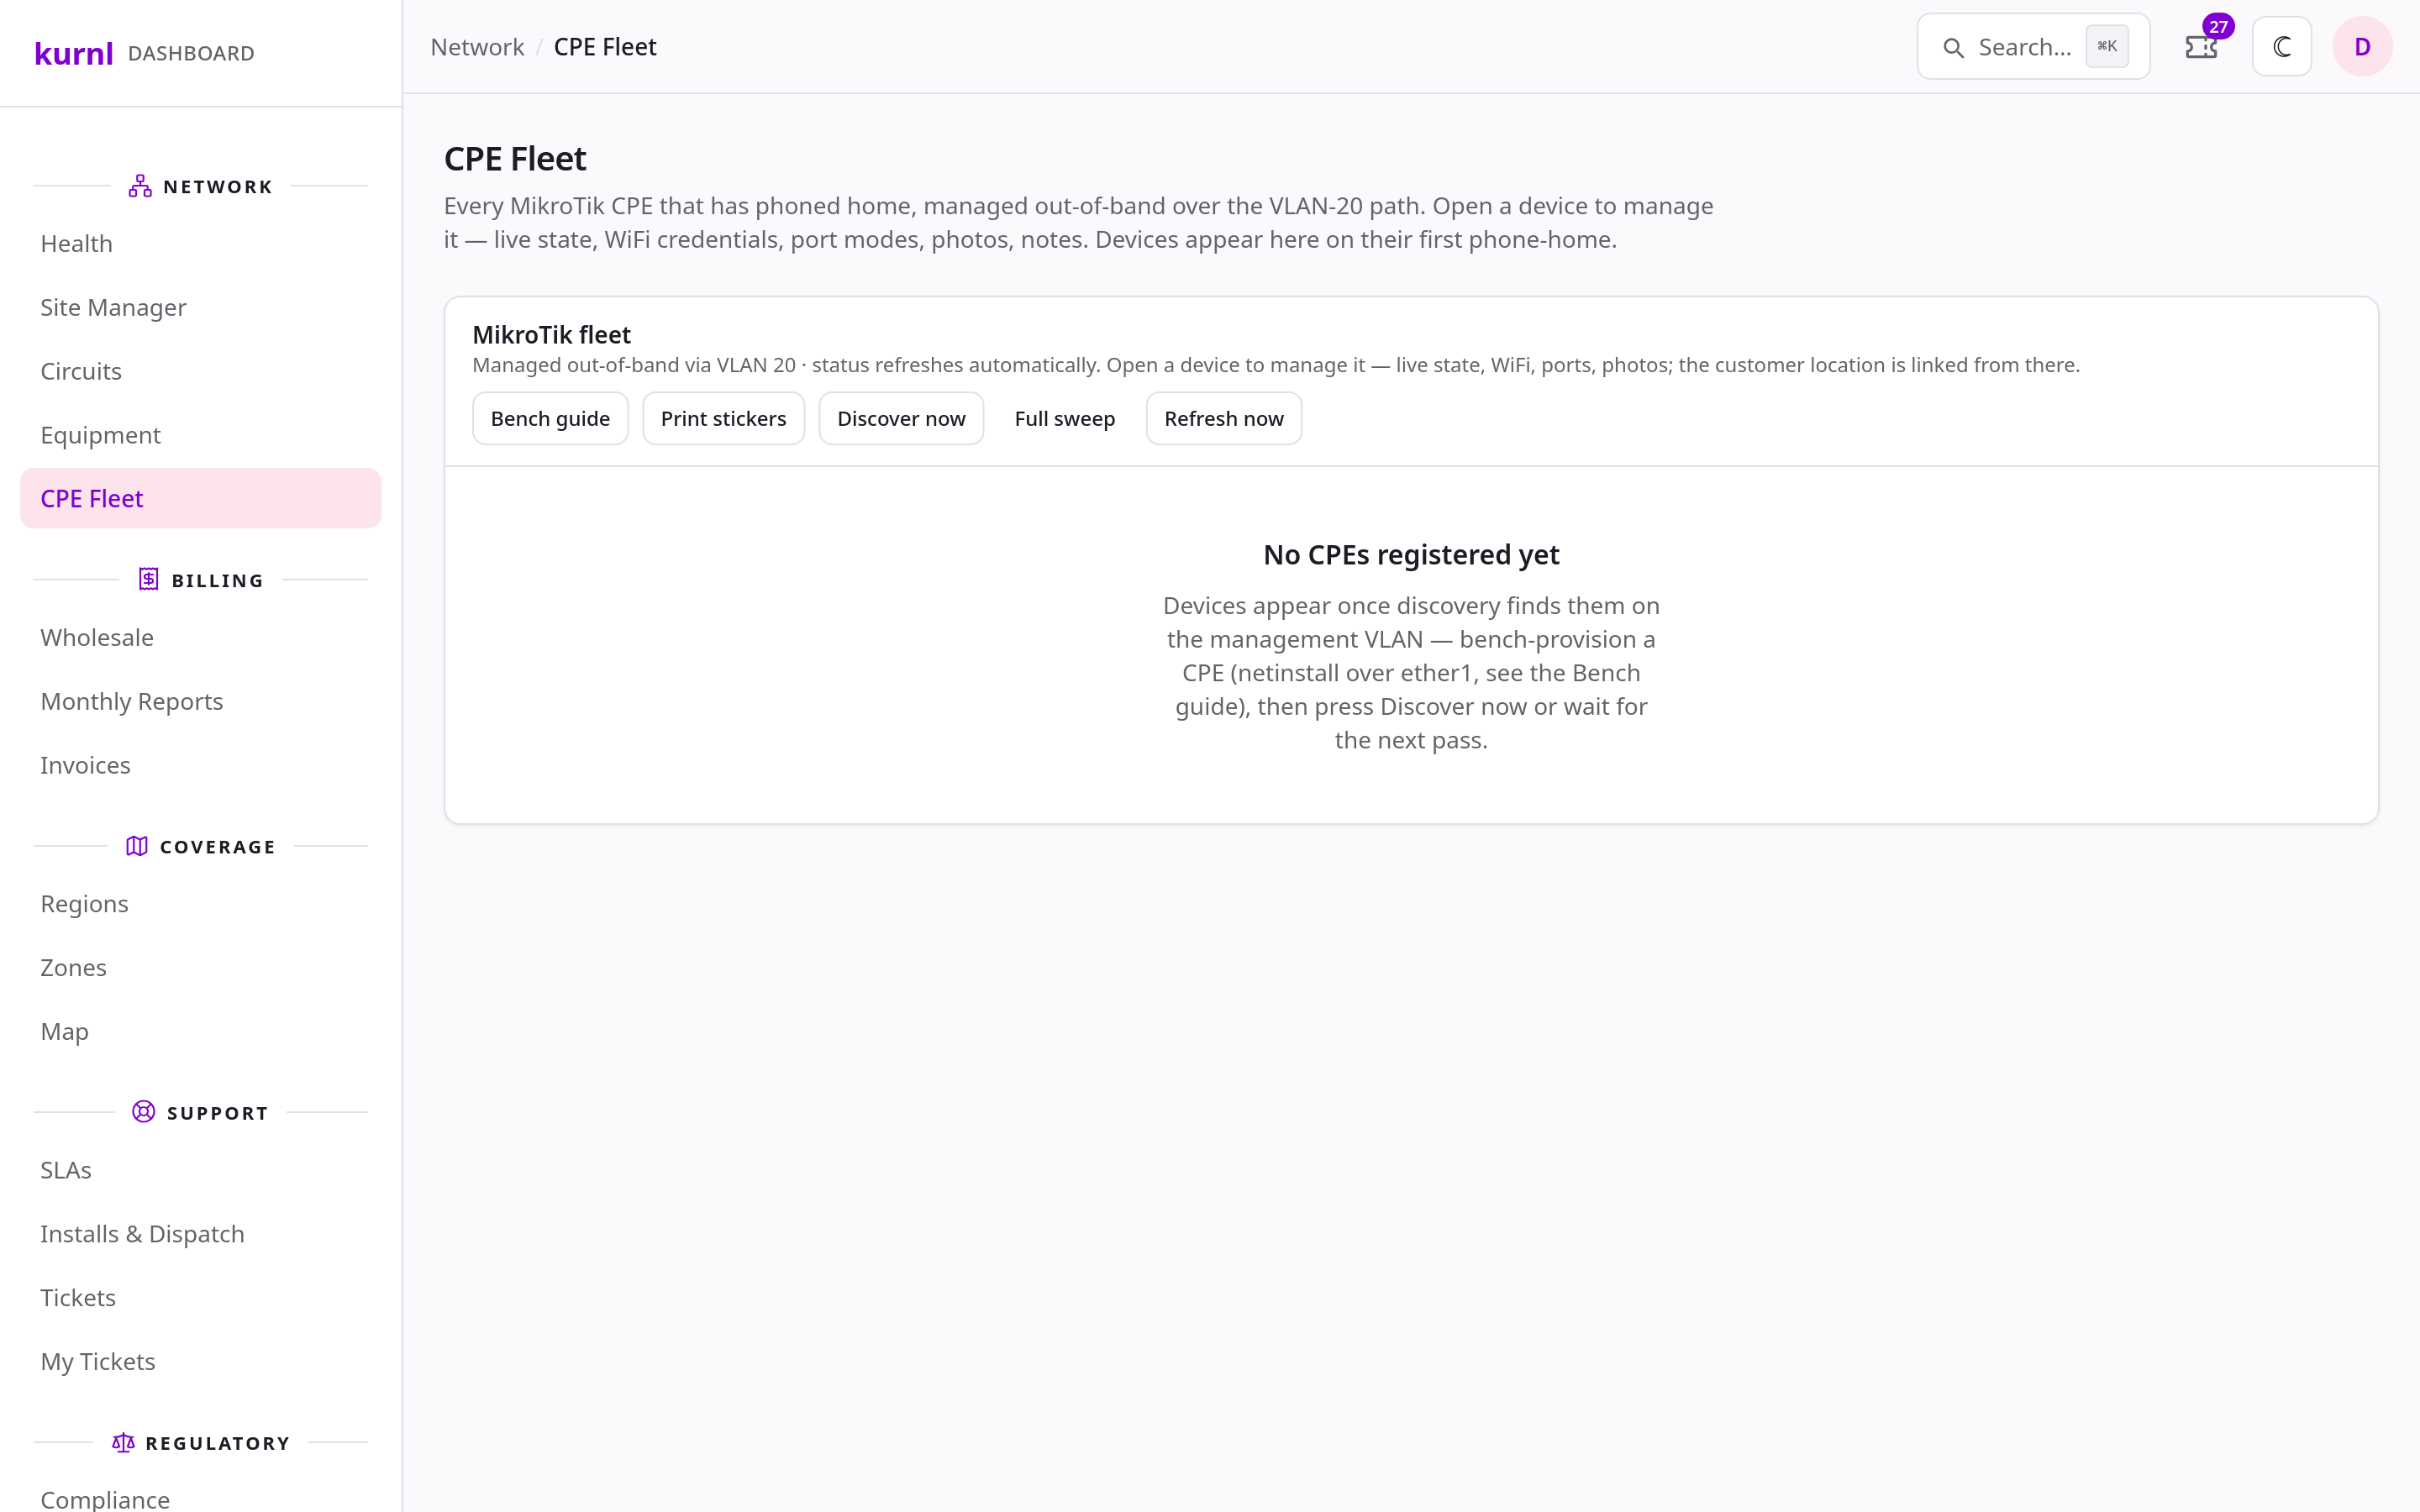
CPE Fleet — Bench guide, Print stickers, Discover now and Full sweep live here; devices appear as rows once discovery has seen them
Who does what
Where to bench — the port, not the switch
A bench port is defined by its VLANs, not by the switch it sits on. Any managed switch works as long as the port:- carries the captive VLAN untagged and the CPE management VLAN tagged — exactly the profile every subscriber port has in the golden configuration;
- sits in the same layer-2 domain as the netinstall server and the platform’s management path;
- is not mapped to a unit in the unit register. That is what keeps a bench device in stock: binding only happens on register ports, and it is also why a bench port must never become a unit port later without clearing it first;
- is copper at the device end — Etherboot only runs over the CPE’s ether1. From an SFP switch port that means a copper SFP (1000BASE-T) or a short DAC/fibre into a small copper switch.
Phase 1 — Bench provisioning
Why the bench: RouterBOOT loads a fresh system only over ether1 copper (Etherboot). Unit ports are SFP, so a device cannot be reset and reloaded inside the unit. One device takes three to five minutes at the bench.Check the bench
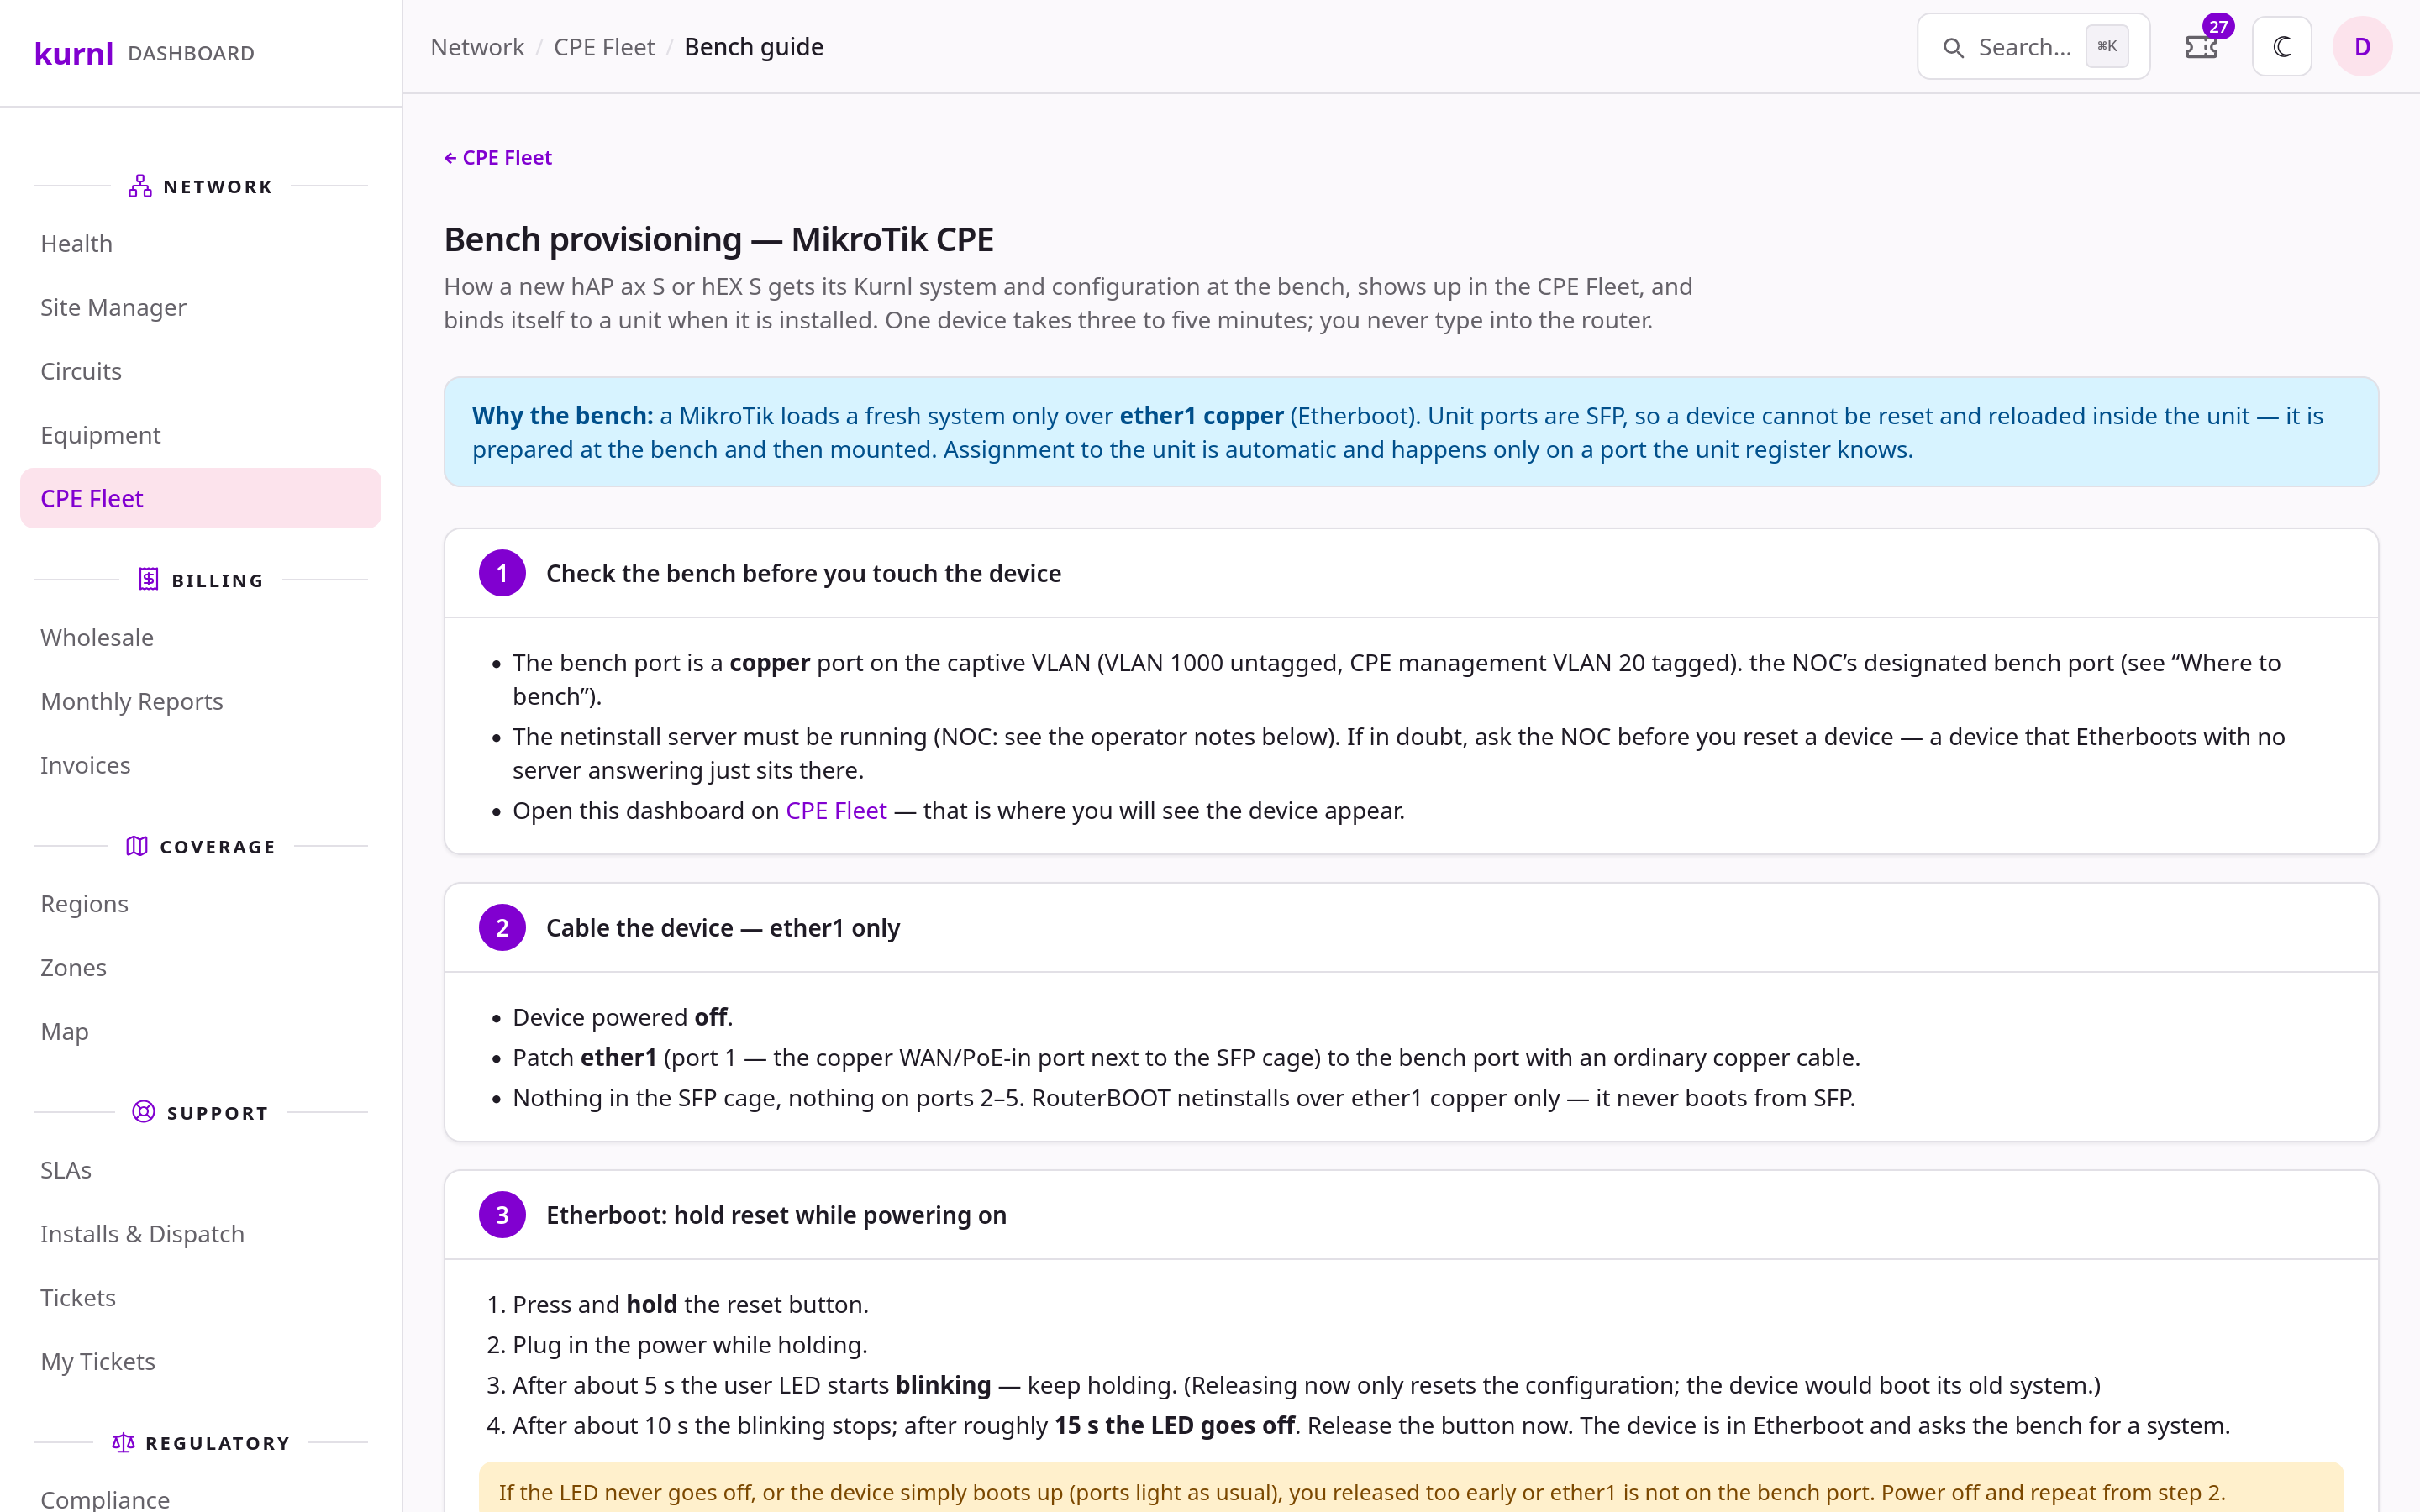
Bench guide in the dashboard
Cable ether1 only
Etherboot: hold reset while powering on
Netinstall runs by itself
Wait for the fleet row
CPE-<serial>, status stock, location
Unassigned; status turns online within a couple of minutes. Check model
and serial against the label. This row is the go signal — it proves
system, configuration and management path. Nothing after five minutes:
Discover now, then Full sweep, then hand the serial to the NOC.Sticker, then power off
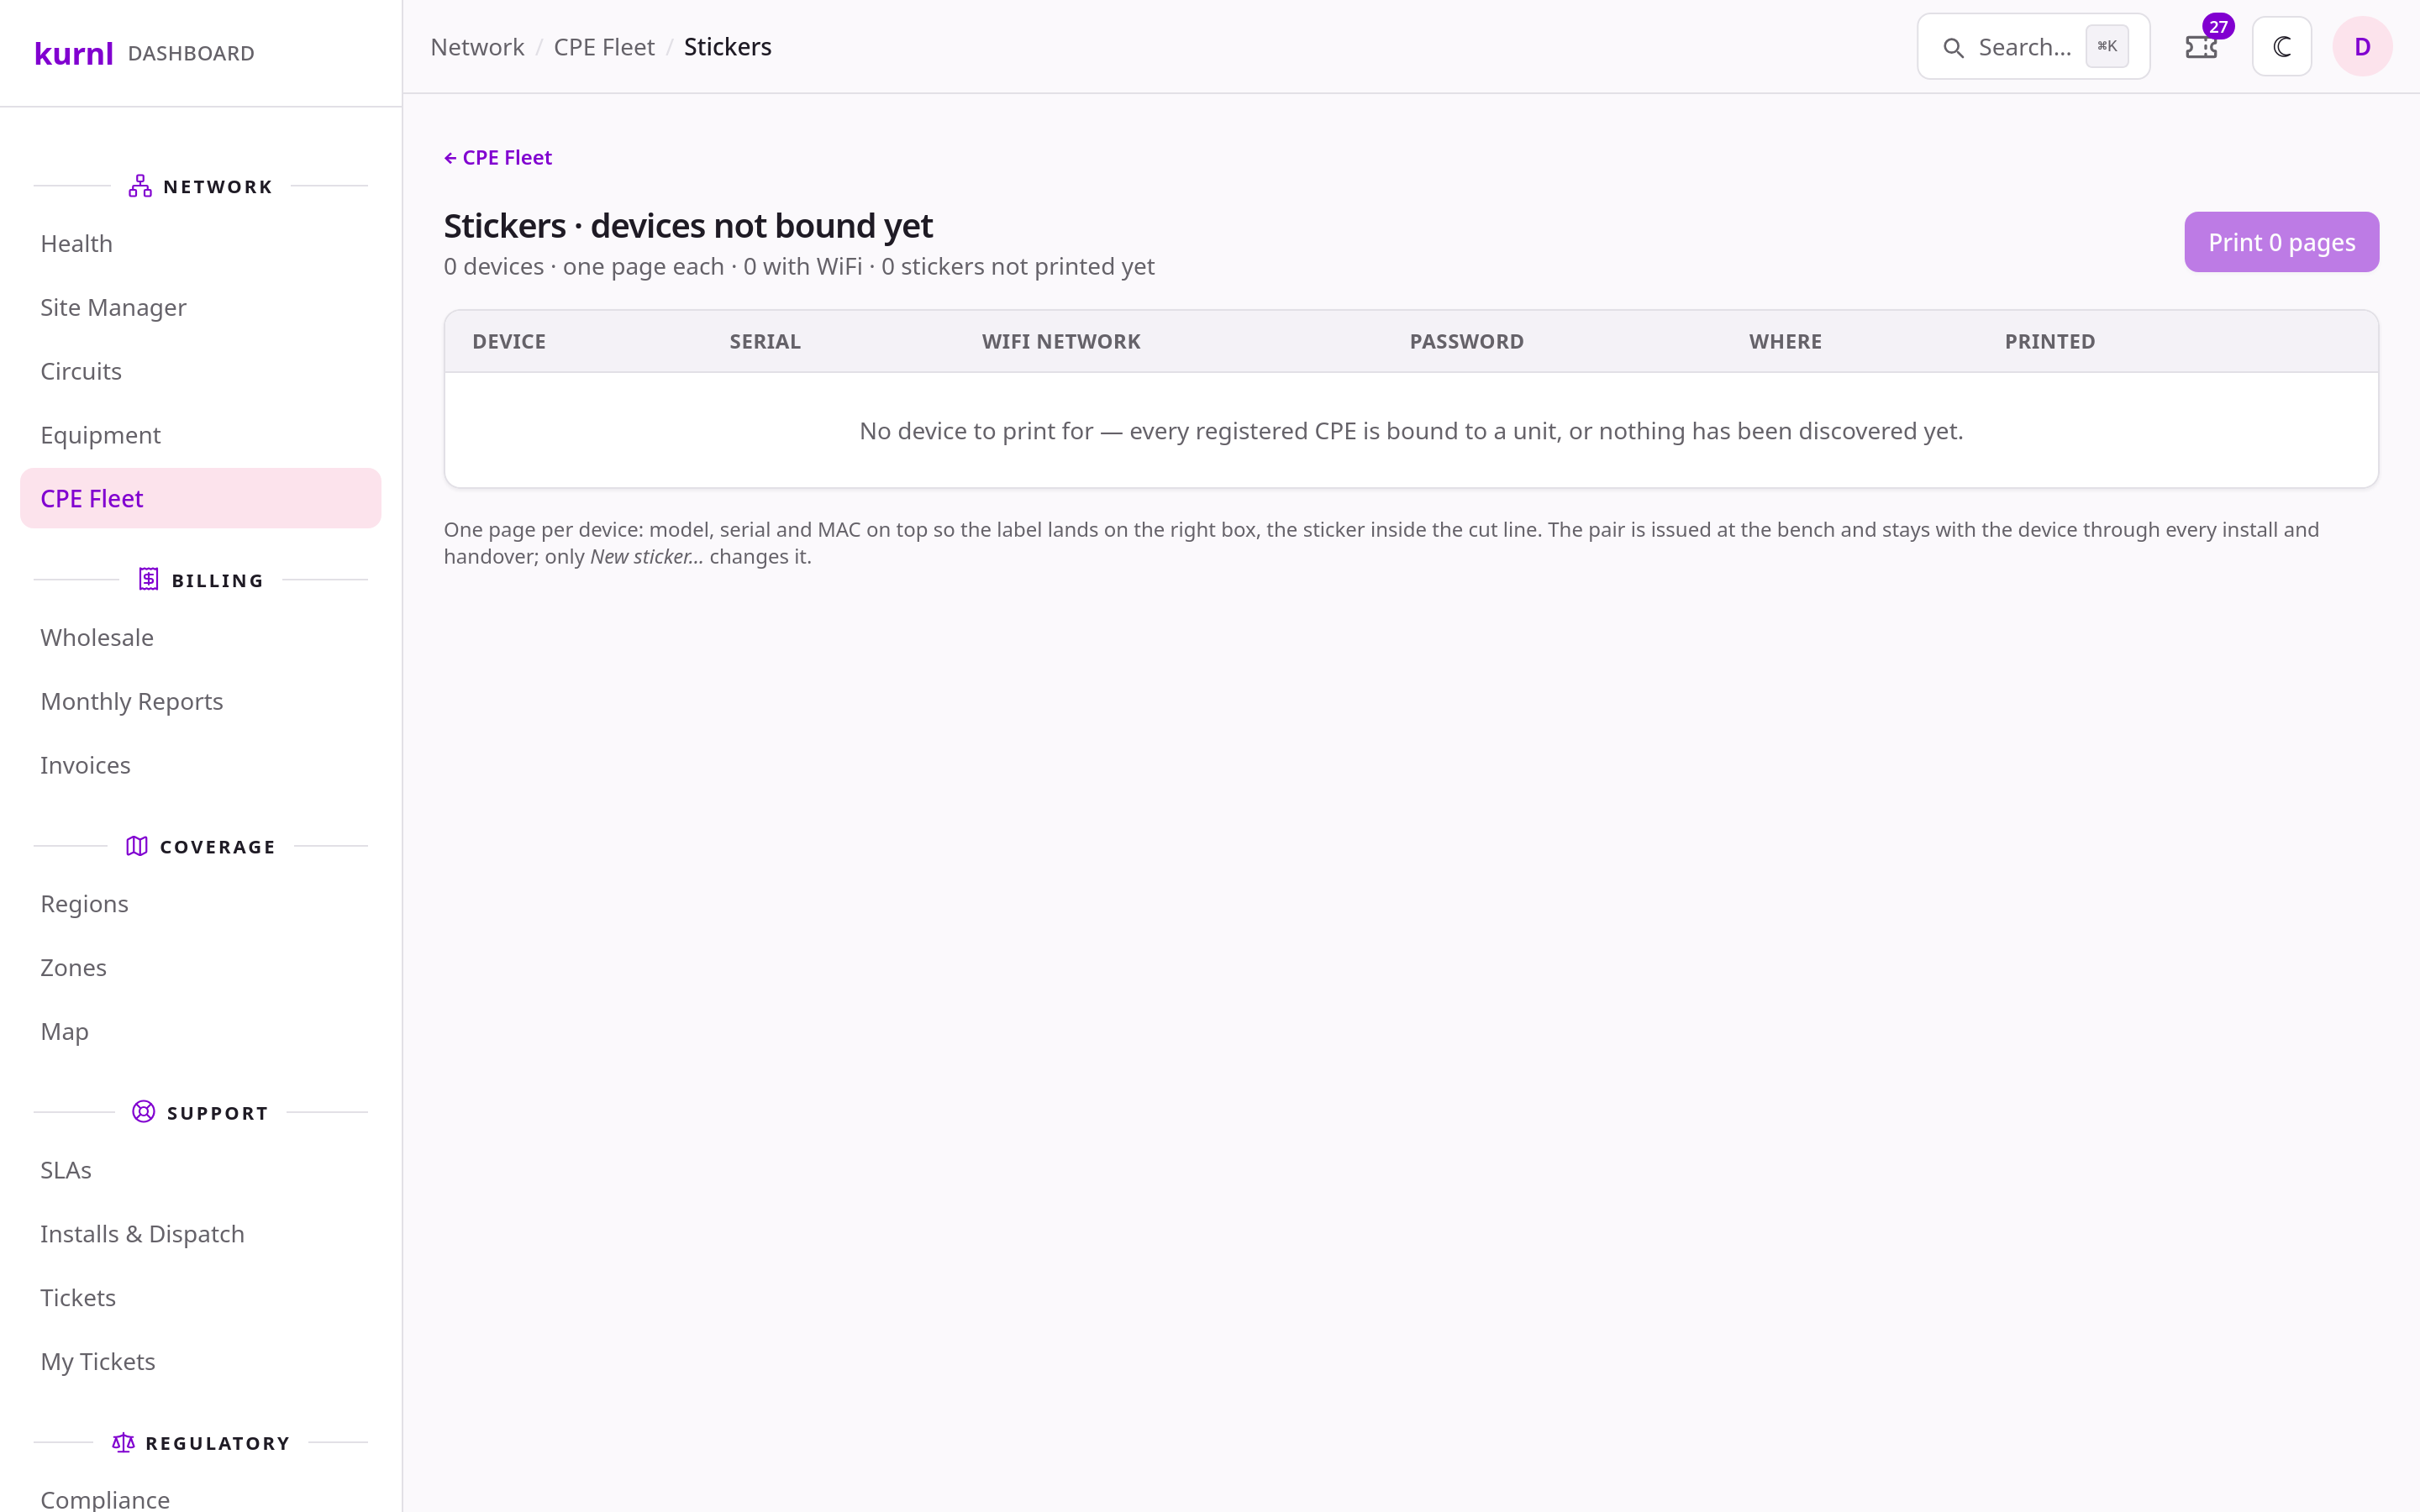
Print stickers — every device not yet bound to a unit
Phase 2 — Stock, job and kit
A pending install becomes a dispatch on Installs & Dispatch. The dispatch carries the visit’s scope, derived from the building’s line type and the unit’s patch state and overridable per card: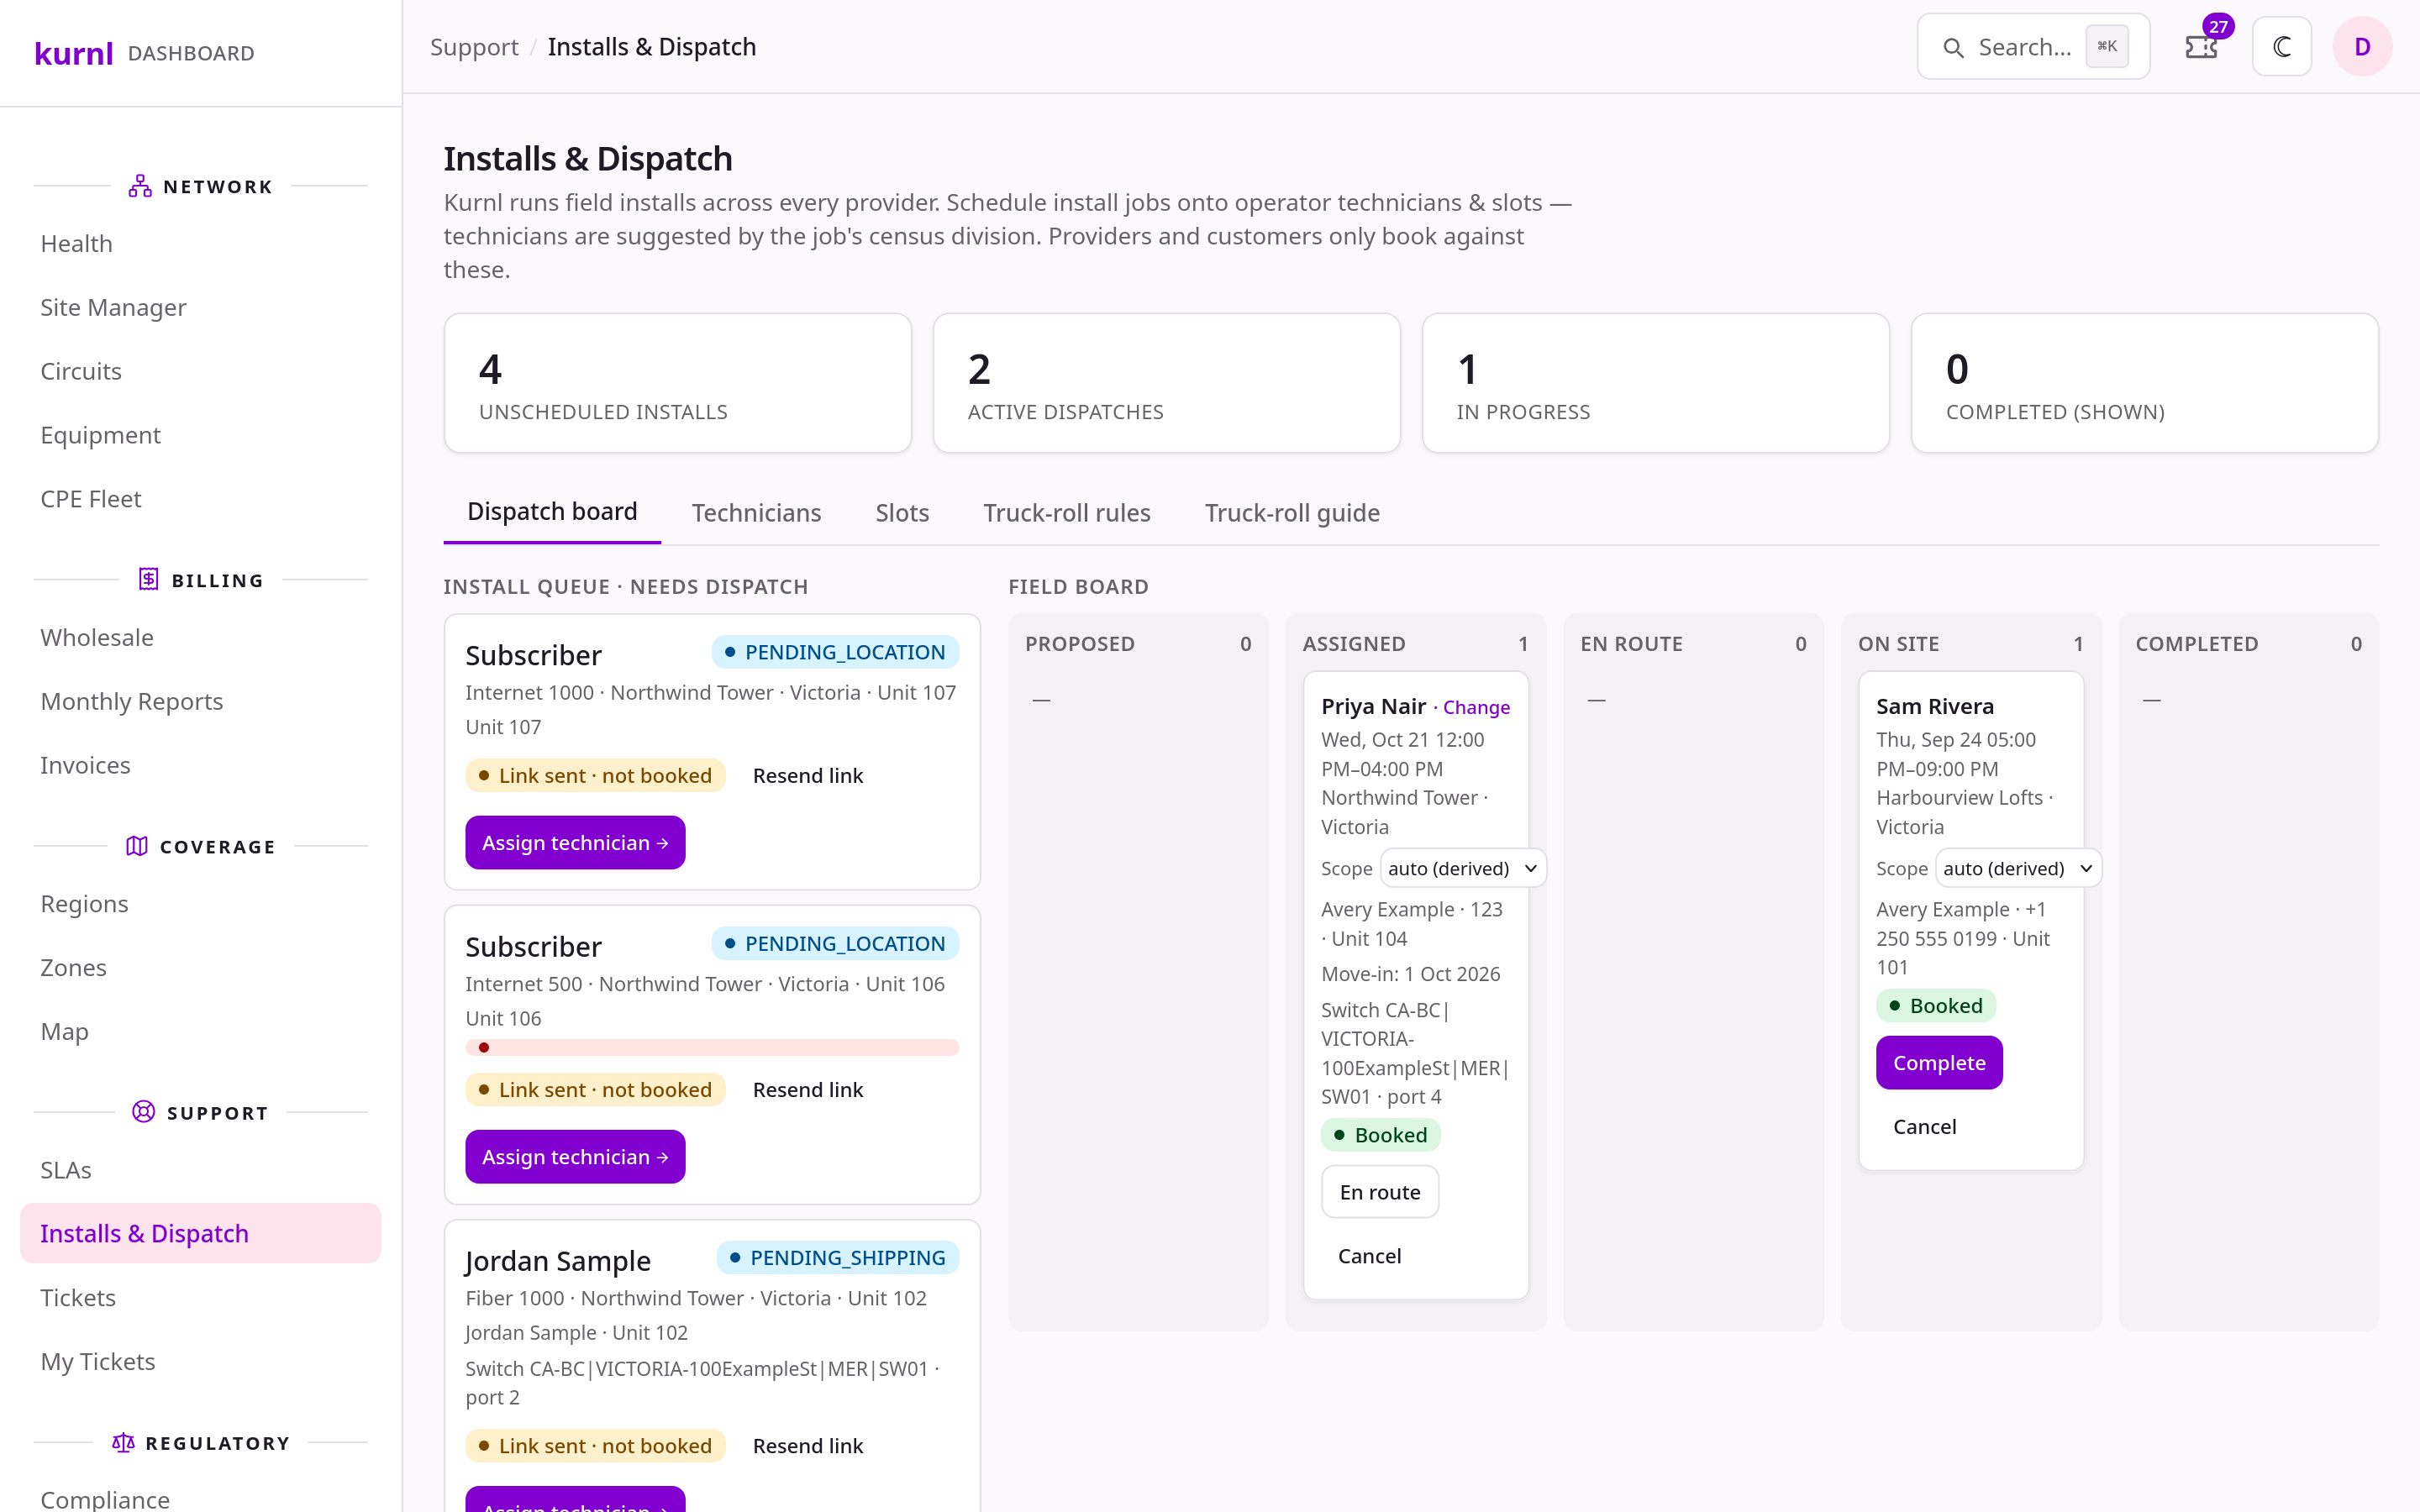
Installs & Dispatch — the dispatch board with the per-job scope
planned_cpe_model on the building, the
kit is derived from it). We use BiDi optics: the two ends are different parts,
one of each per line.
Phase 3 — The technician’s visit
Technicians sign in to the operator portal with the technician role and land on My jobs (/field/jobs); every other page redirects them back.
The operator creates the sign-in once: Installs & Dispatch → Technicians →
Set up sign-in sends a mail that lets the technician choose a password. No
MFA is required for this role.
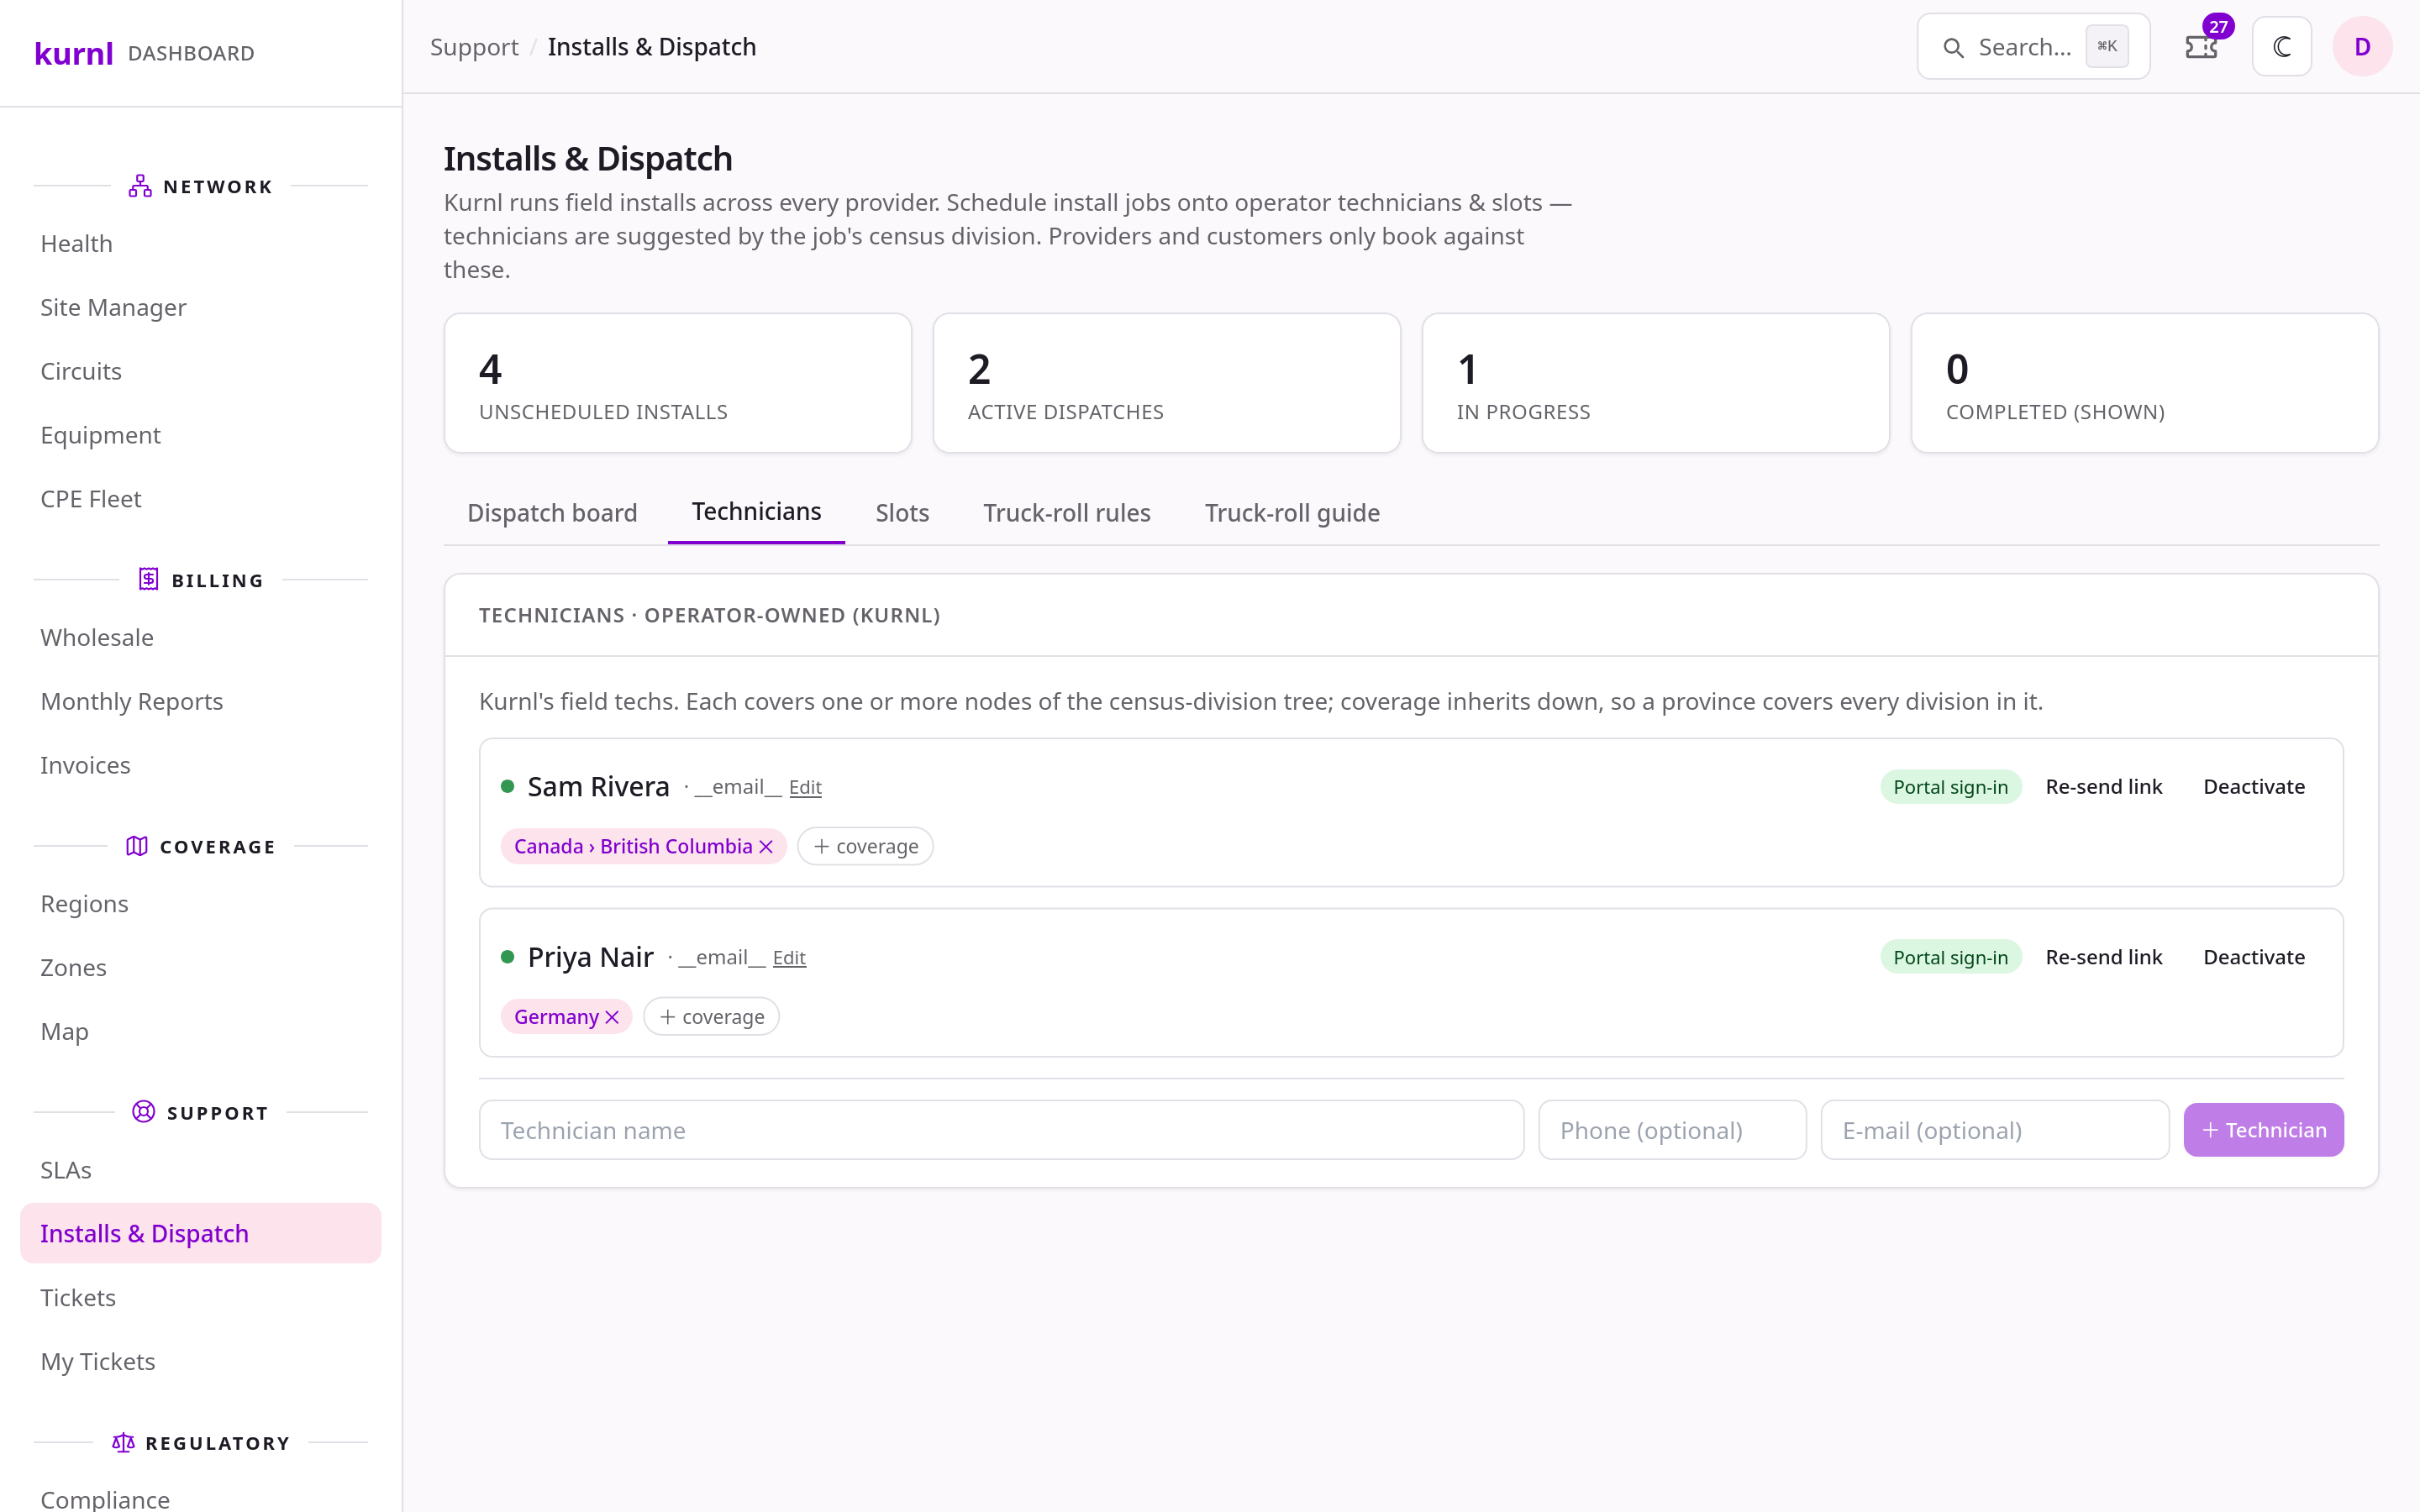
Technicians tab — Portal sign-in state, Re-send link, coverage per technician
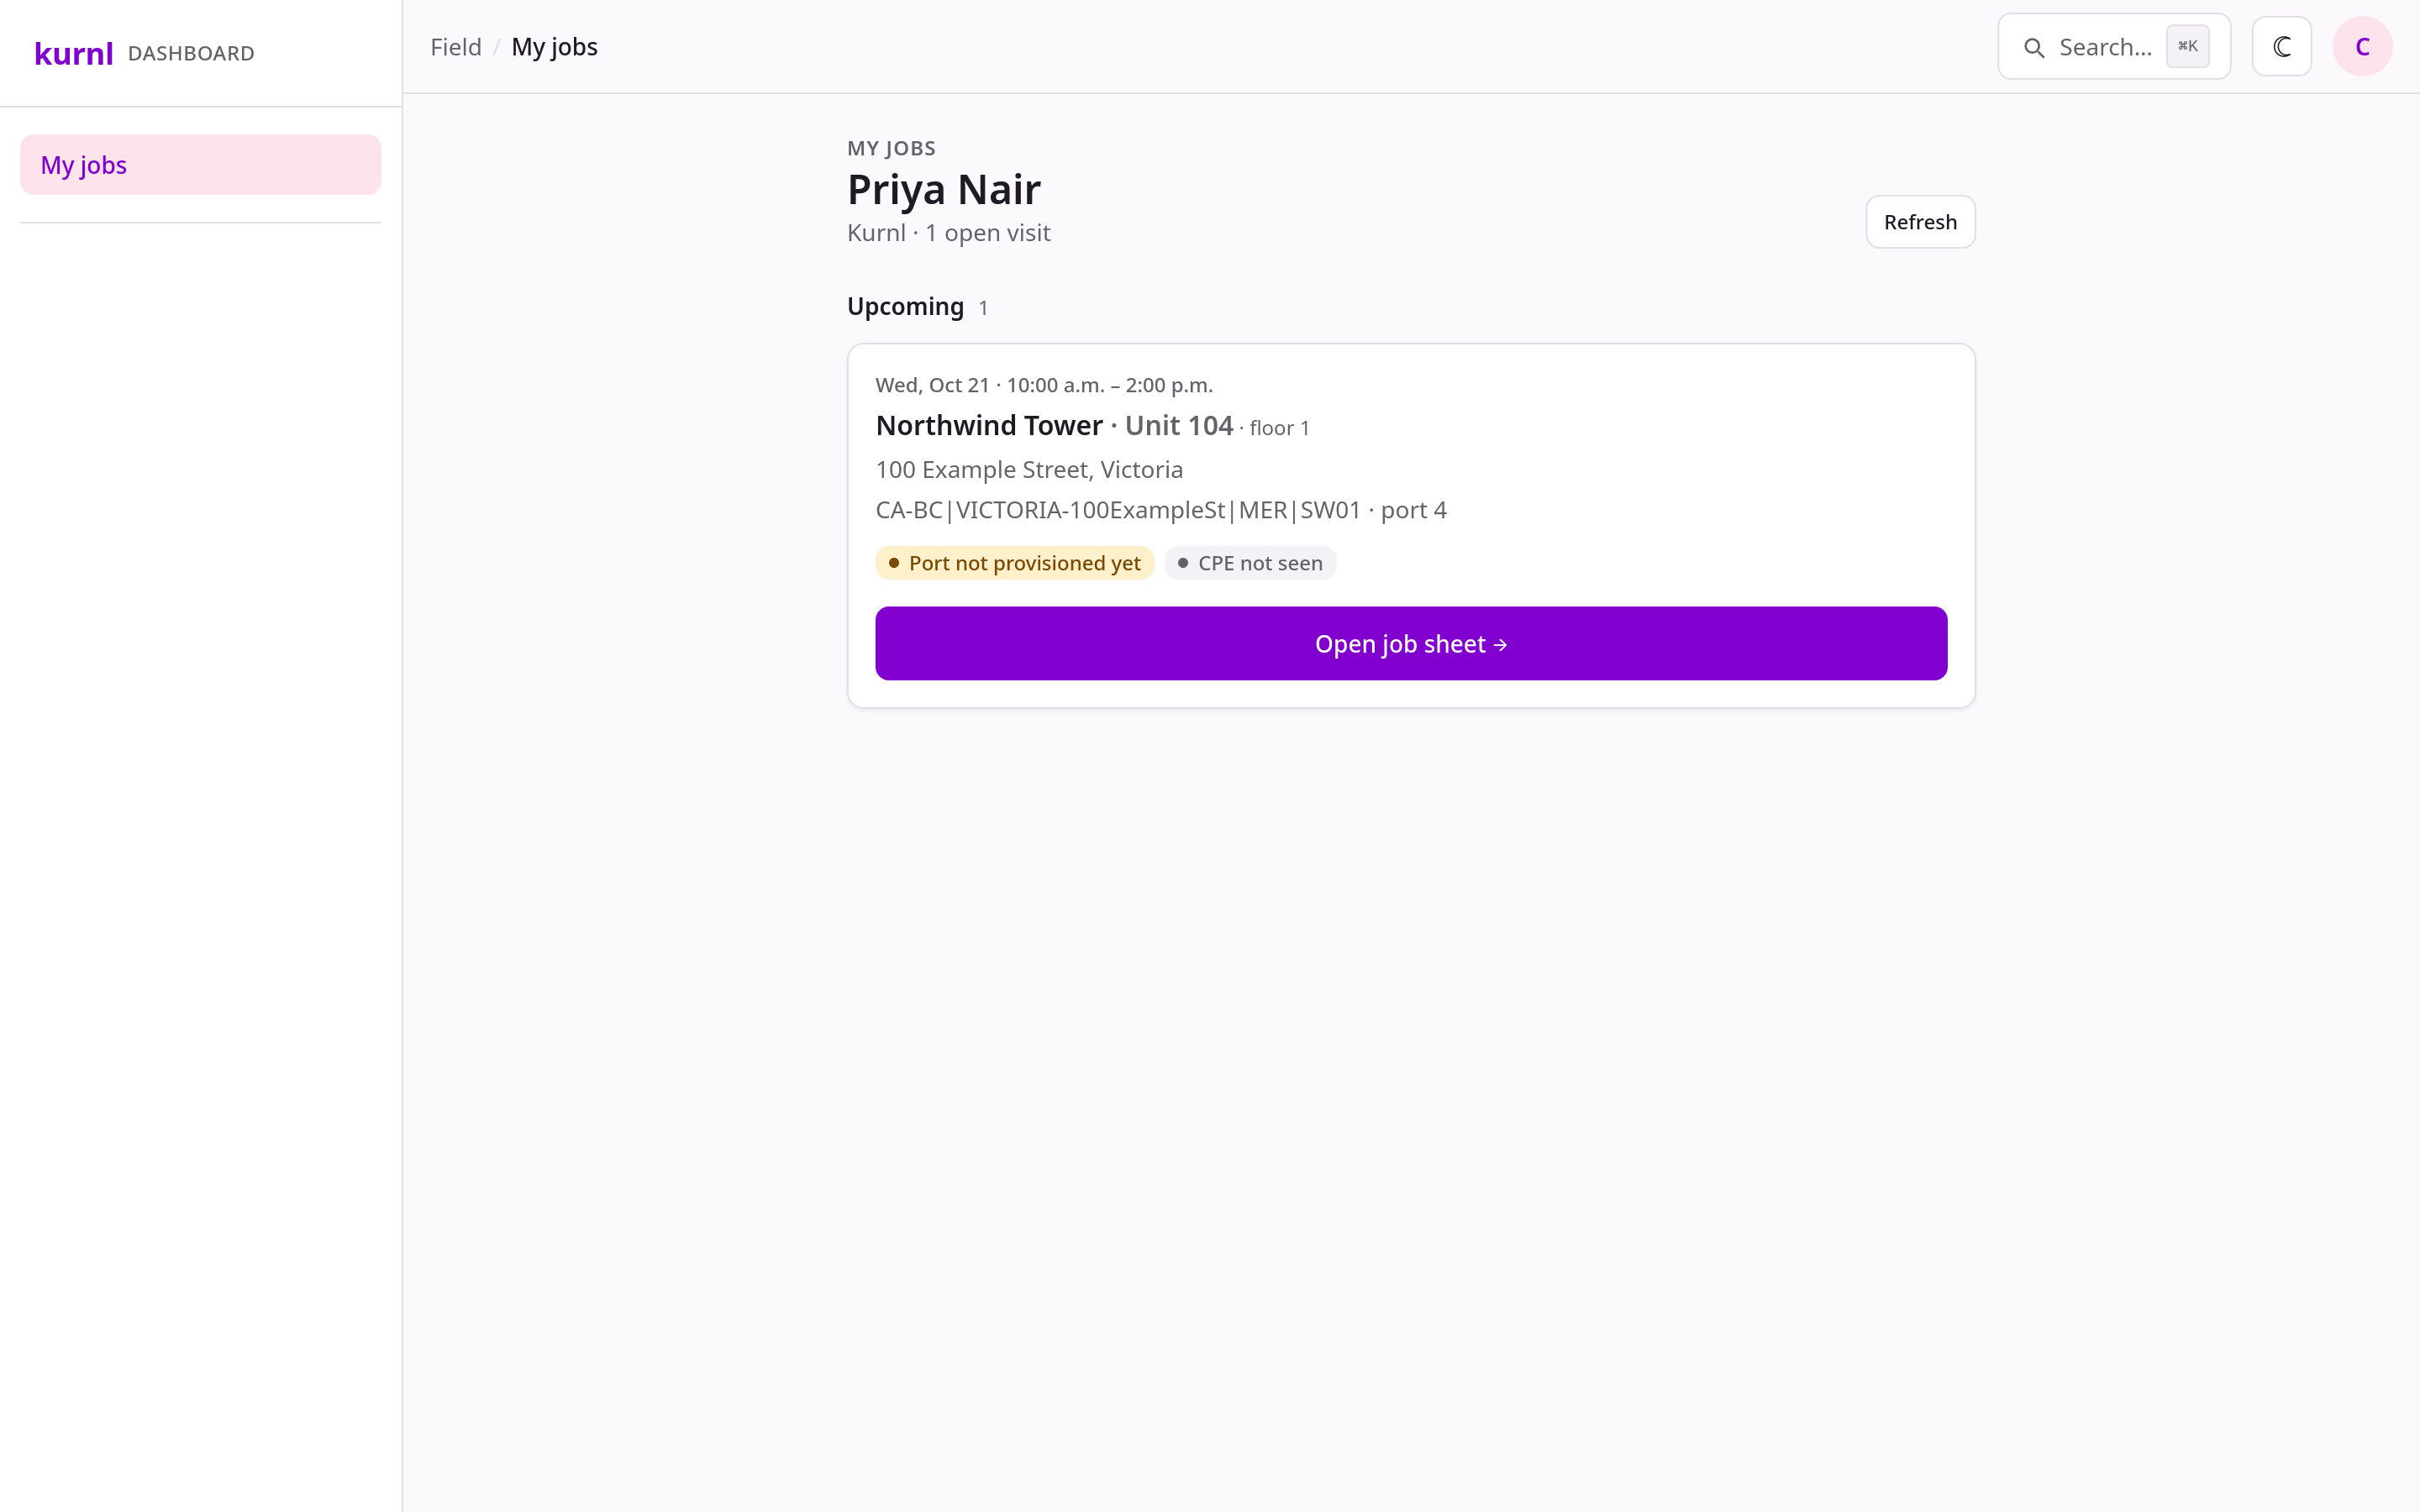
My jobs — what the technician sees after signing in
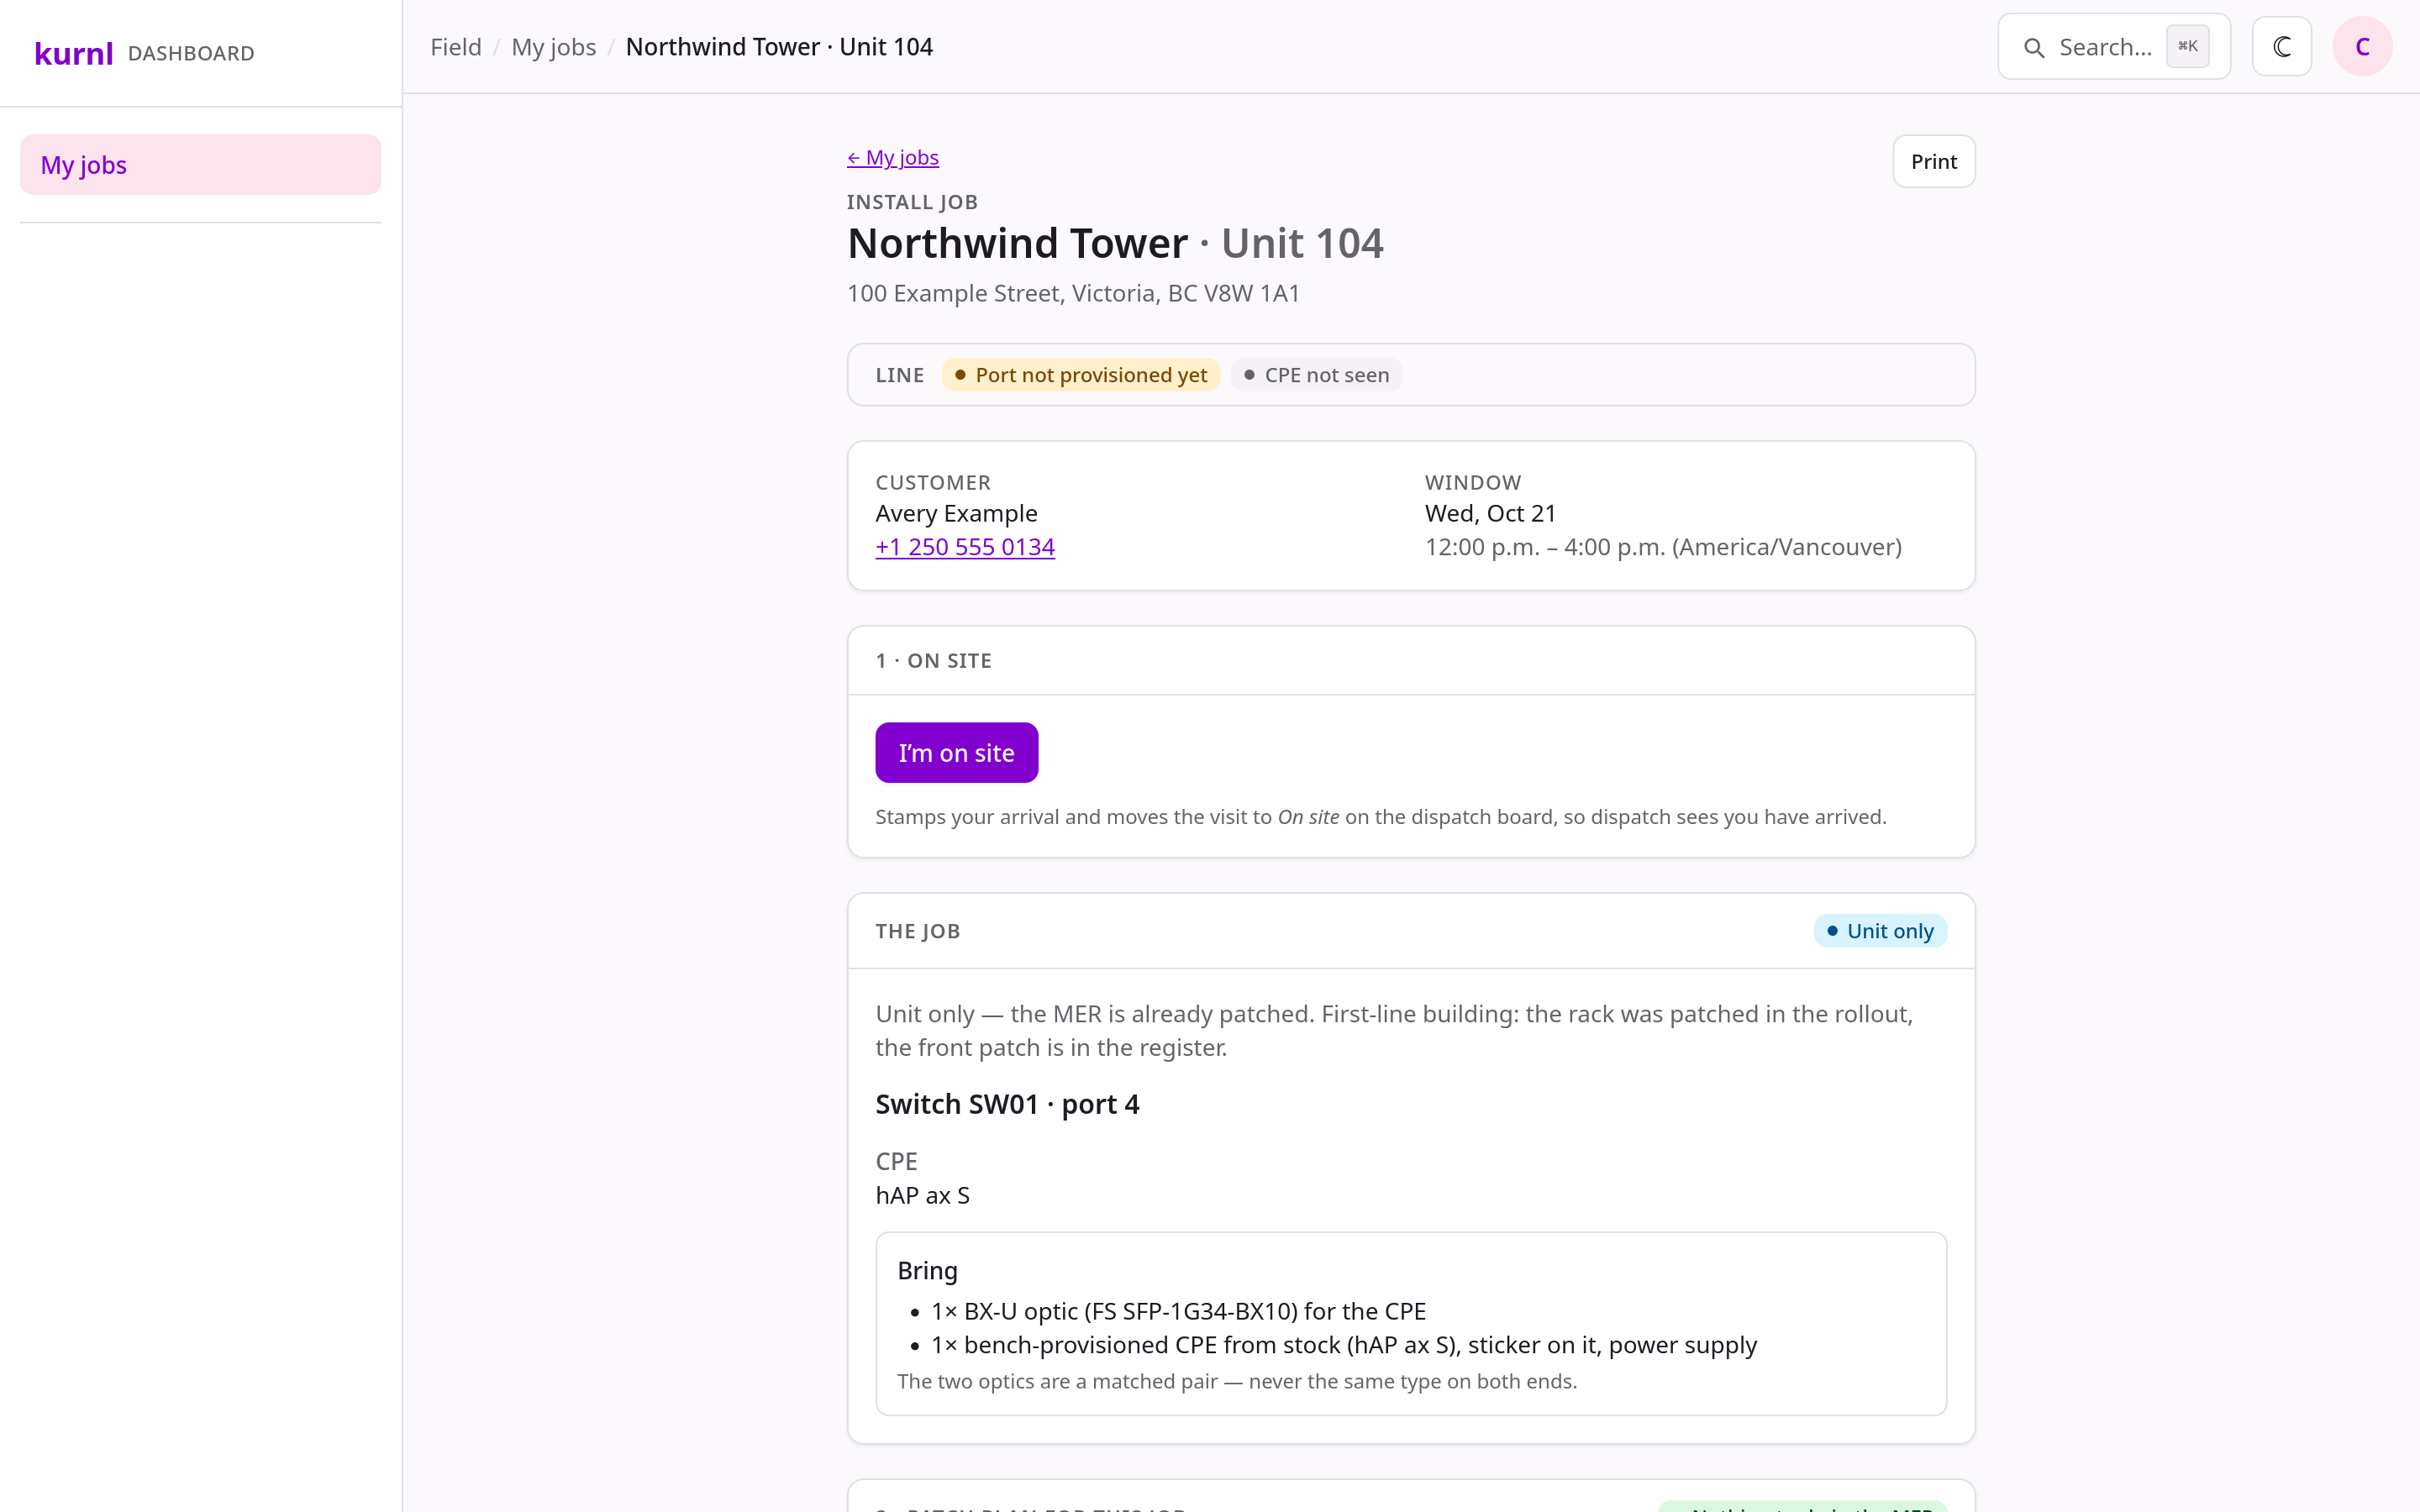
A job sheet — line status strip, customer contact, window, then the numbered steps
1 · On site
2 · Patch plan (MER)
3 · Device (unit)
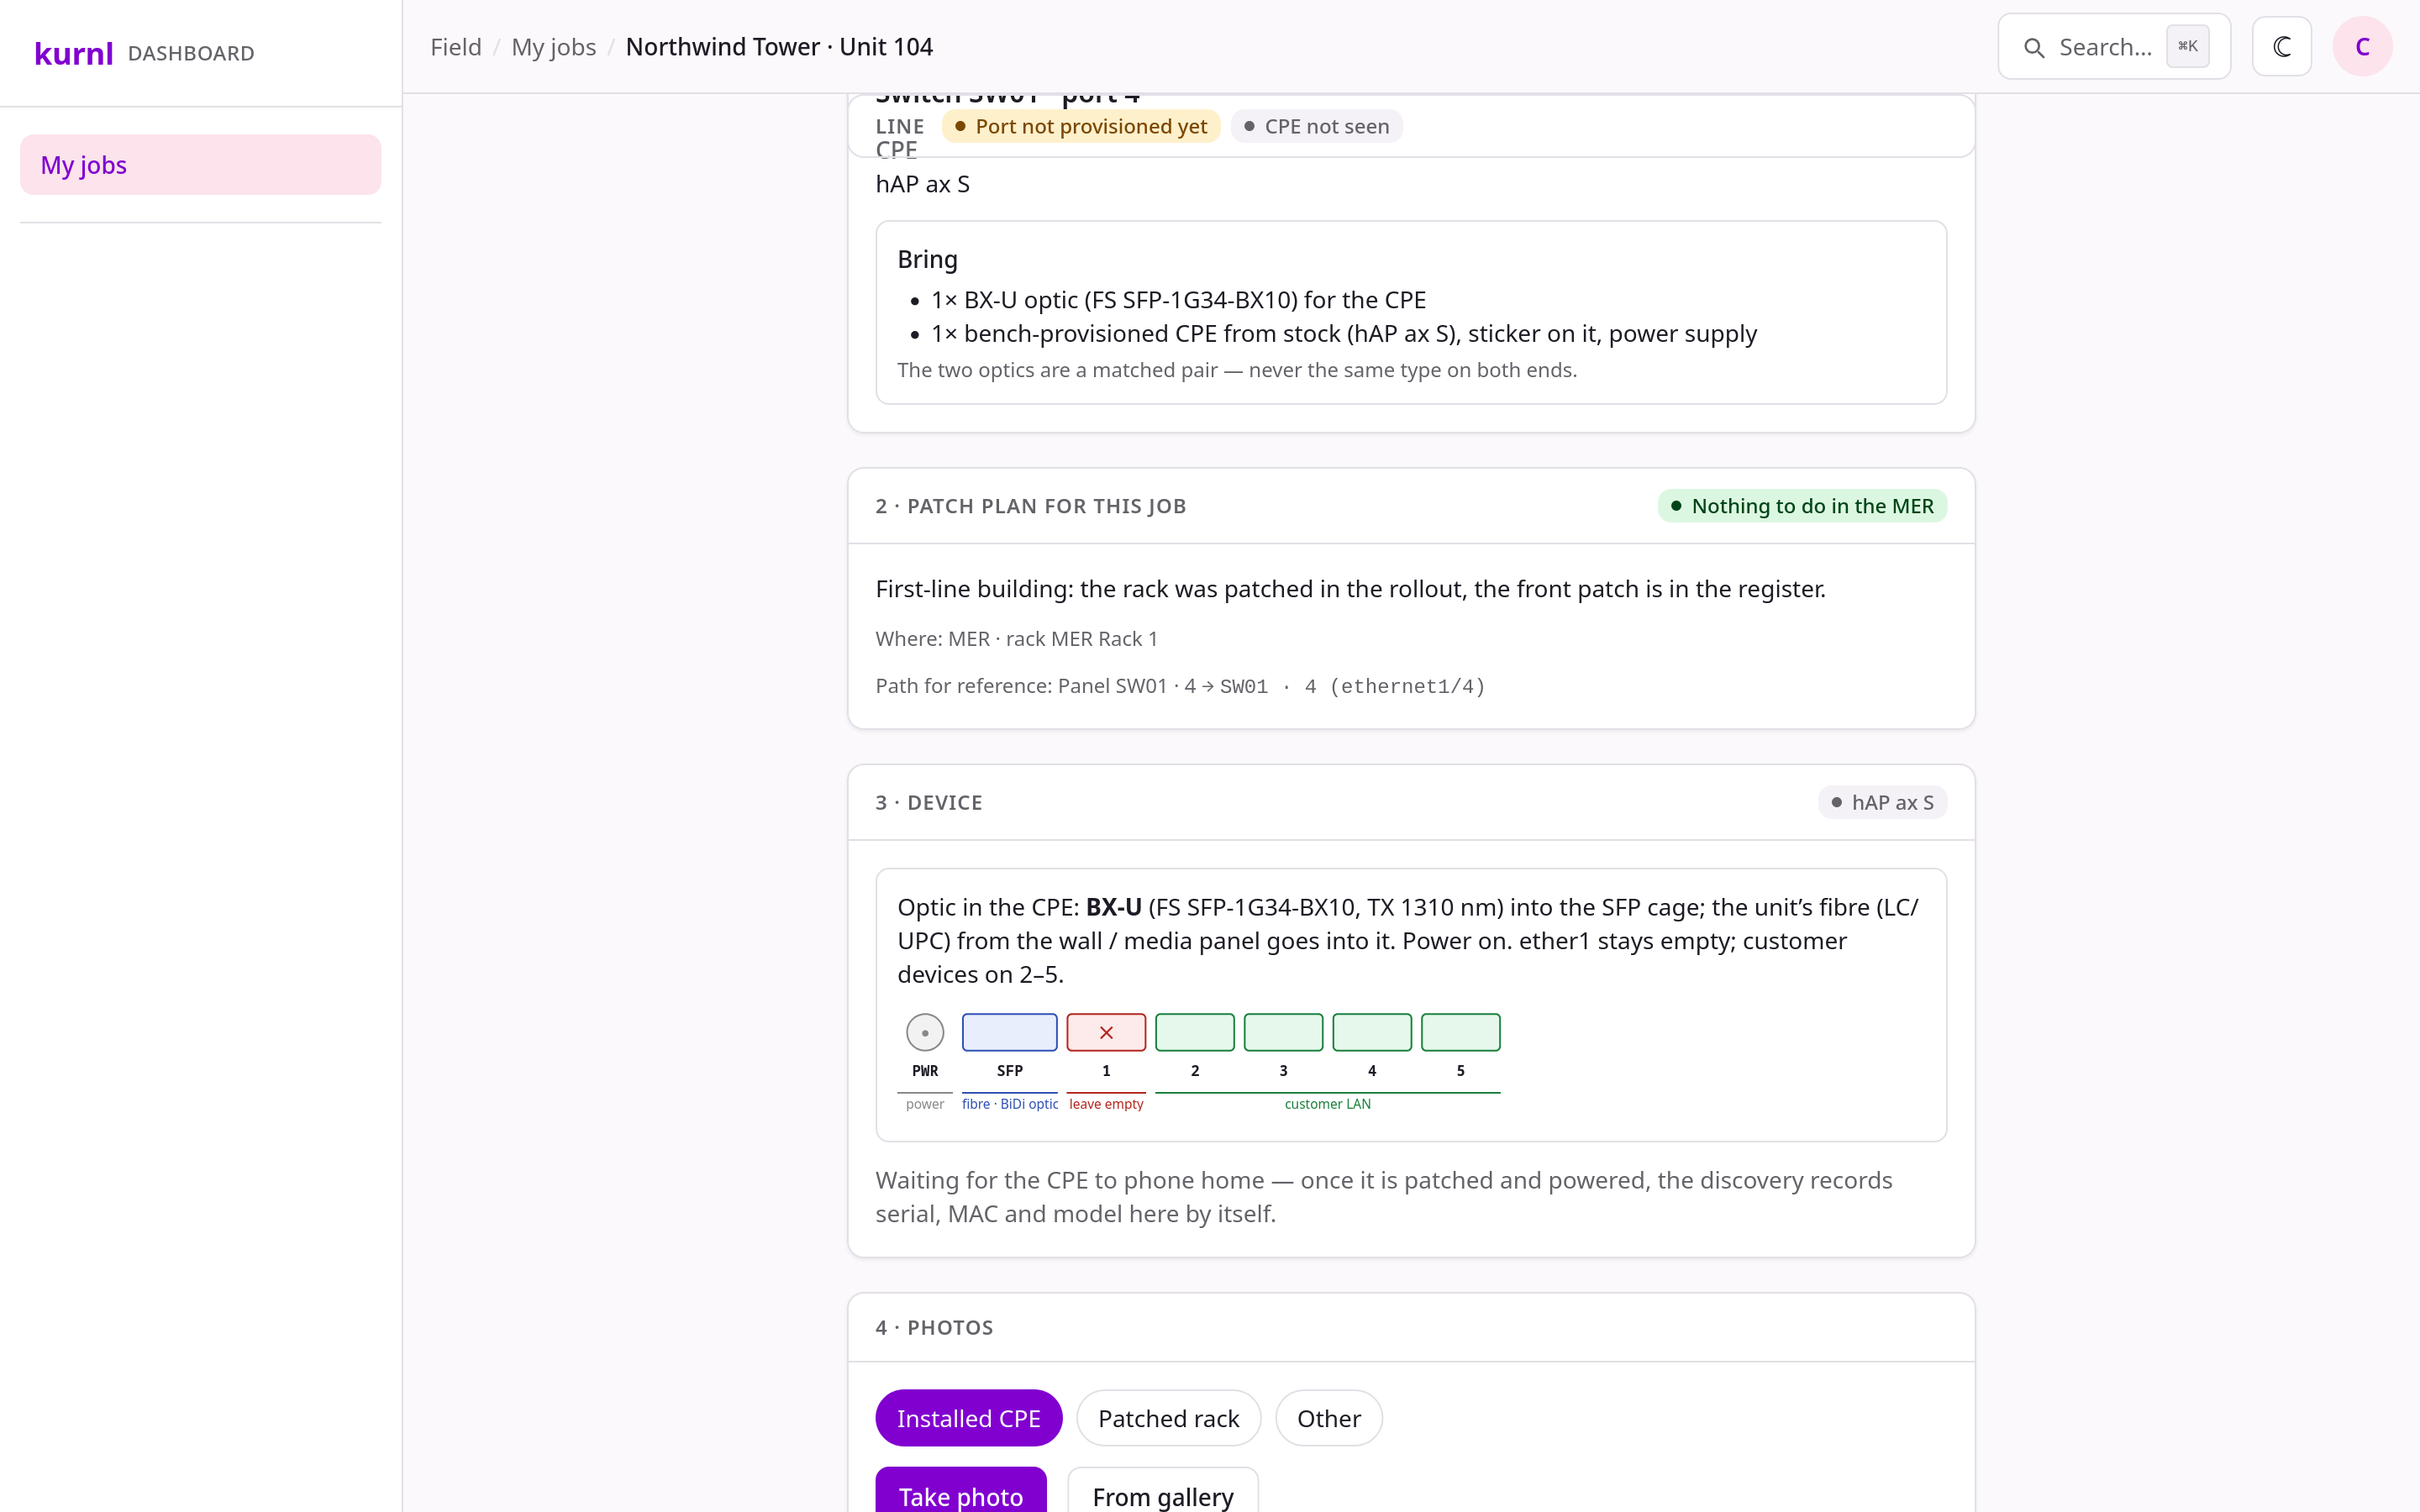
Steps 2–4 on the sheet: patch plan (here: nothing to do in the MER), device with the optic and the port strip, photos
4 · Photos
5 · Work done
Phase 4 — Binding and activation, on their own
Within the next discovery pass (≤ 2 min) the switch reports the device’s MAC on the unit’s port. The MAC search waits for every switch and places a device only at a port that the unit register maps to a unit; uplinks and trunks never count. The platform then:- binds the device to the unit — location Building · Unit, identity
renamed to the canonical
…|UNIT-xx|CPE, status stays online; - moves the unit’s port from the captive VLAN to the provider’s VLAN once the subscription is there, so the resident leaves the captive portal and gets the ISP’s service;
- records the install as completed for the subscription and fires the
install.completedevent — wire follow-ups in Automations.
Credentials, identities and labels — the decisions
- Bench password: baked in by netinstall, known only to the server and the middleware, rotated to a per-device password on first discovery. No technician ever needs or sees a router password; the operator portal is the only way in. A handover reset (the 5-second reset in the unit) restores the golden configuration and the device’s sticker pair and keeps the per-device admin password.
- Identity:
CPE-<serial>at the bench, the canonicalREGION|SITE|ROOM|UNIT-xx|CPEafter binding. The technician does not name anything. - Sticker (Wi-Fi name + password + QR + port legend): belongs to the device, issued at the bench, printed from CPE Fleet before the device leaves the bench. It follows the device into the next unit after a move-out; a unit never has a sticker of its own. “New sticker…” on a device rotates the pair and reprints.
- Device label from the factory: stays; the serial on it is what the bench technician checks against the fleet row.
Troubleshooting
Operator notes (NOC)
- Discovery: lease probe on the management VLAN every two minutes, full pool sweep once a day; Discover now runs one pass, Full sweep the whole pool.
- Stock per building: keep at least one provisioned device of the building’s planned model in stock before a truck roll is booked — the dispatch’s kit list assumes it.
- Host, service and log names of the netinstall server, the seed script and the bench port per site are NOC-internal: dashboard → CPE Fleet → Bench guide → Operator notes (operator login).
Still to settle
- Remote buildings without a bench (Estoya via HSIA, later CCI): pre-provision in Victoria and ship, or a small netinstall host on site.
- NOC bench port at Harbour Road: confirm the profile on the live switch and fit the copper SFP; decide whether a small copper bench switch replaces it.
- Who prints and applies stickers when devices are shipped rather than carried by the installing technician.
- Spare-device policy per building (how many stock CPEs travel with the technician).