Create a customer, give them a service location with a plan, and follow the line until it is live — or open an anonymous line for a partner.
Most customers order through the marketplace by themselves. When you take an
order yourself — on the phone, in a shop, for a business — you add the
customer and their subscription in the dashboard.
Admin and support staff can add customers; sales staff can view them, and the
buttons they cannot use are hidden. The Customers pages need the Customer
management module.
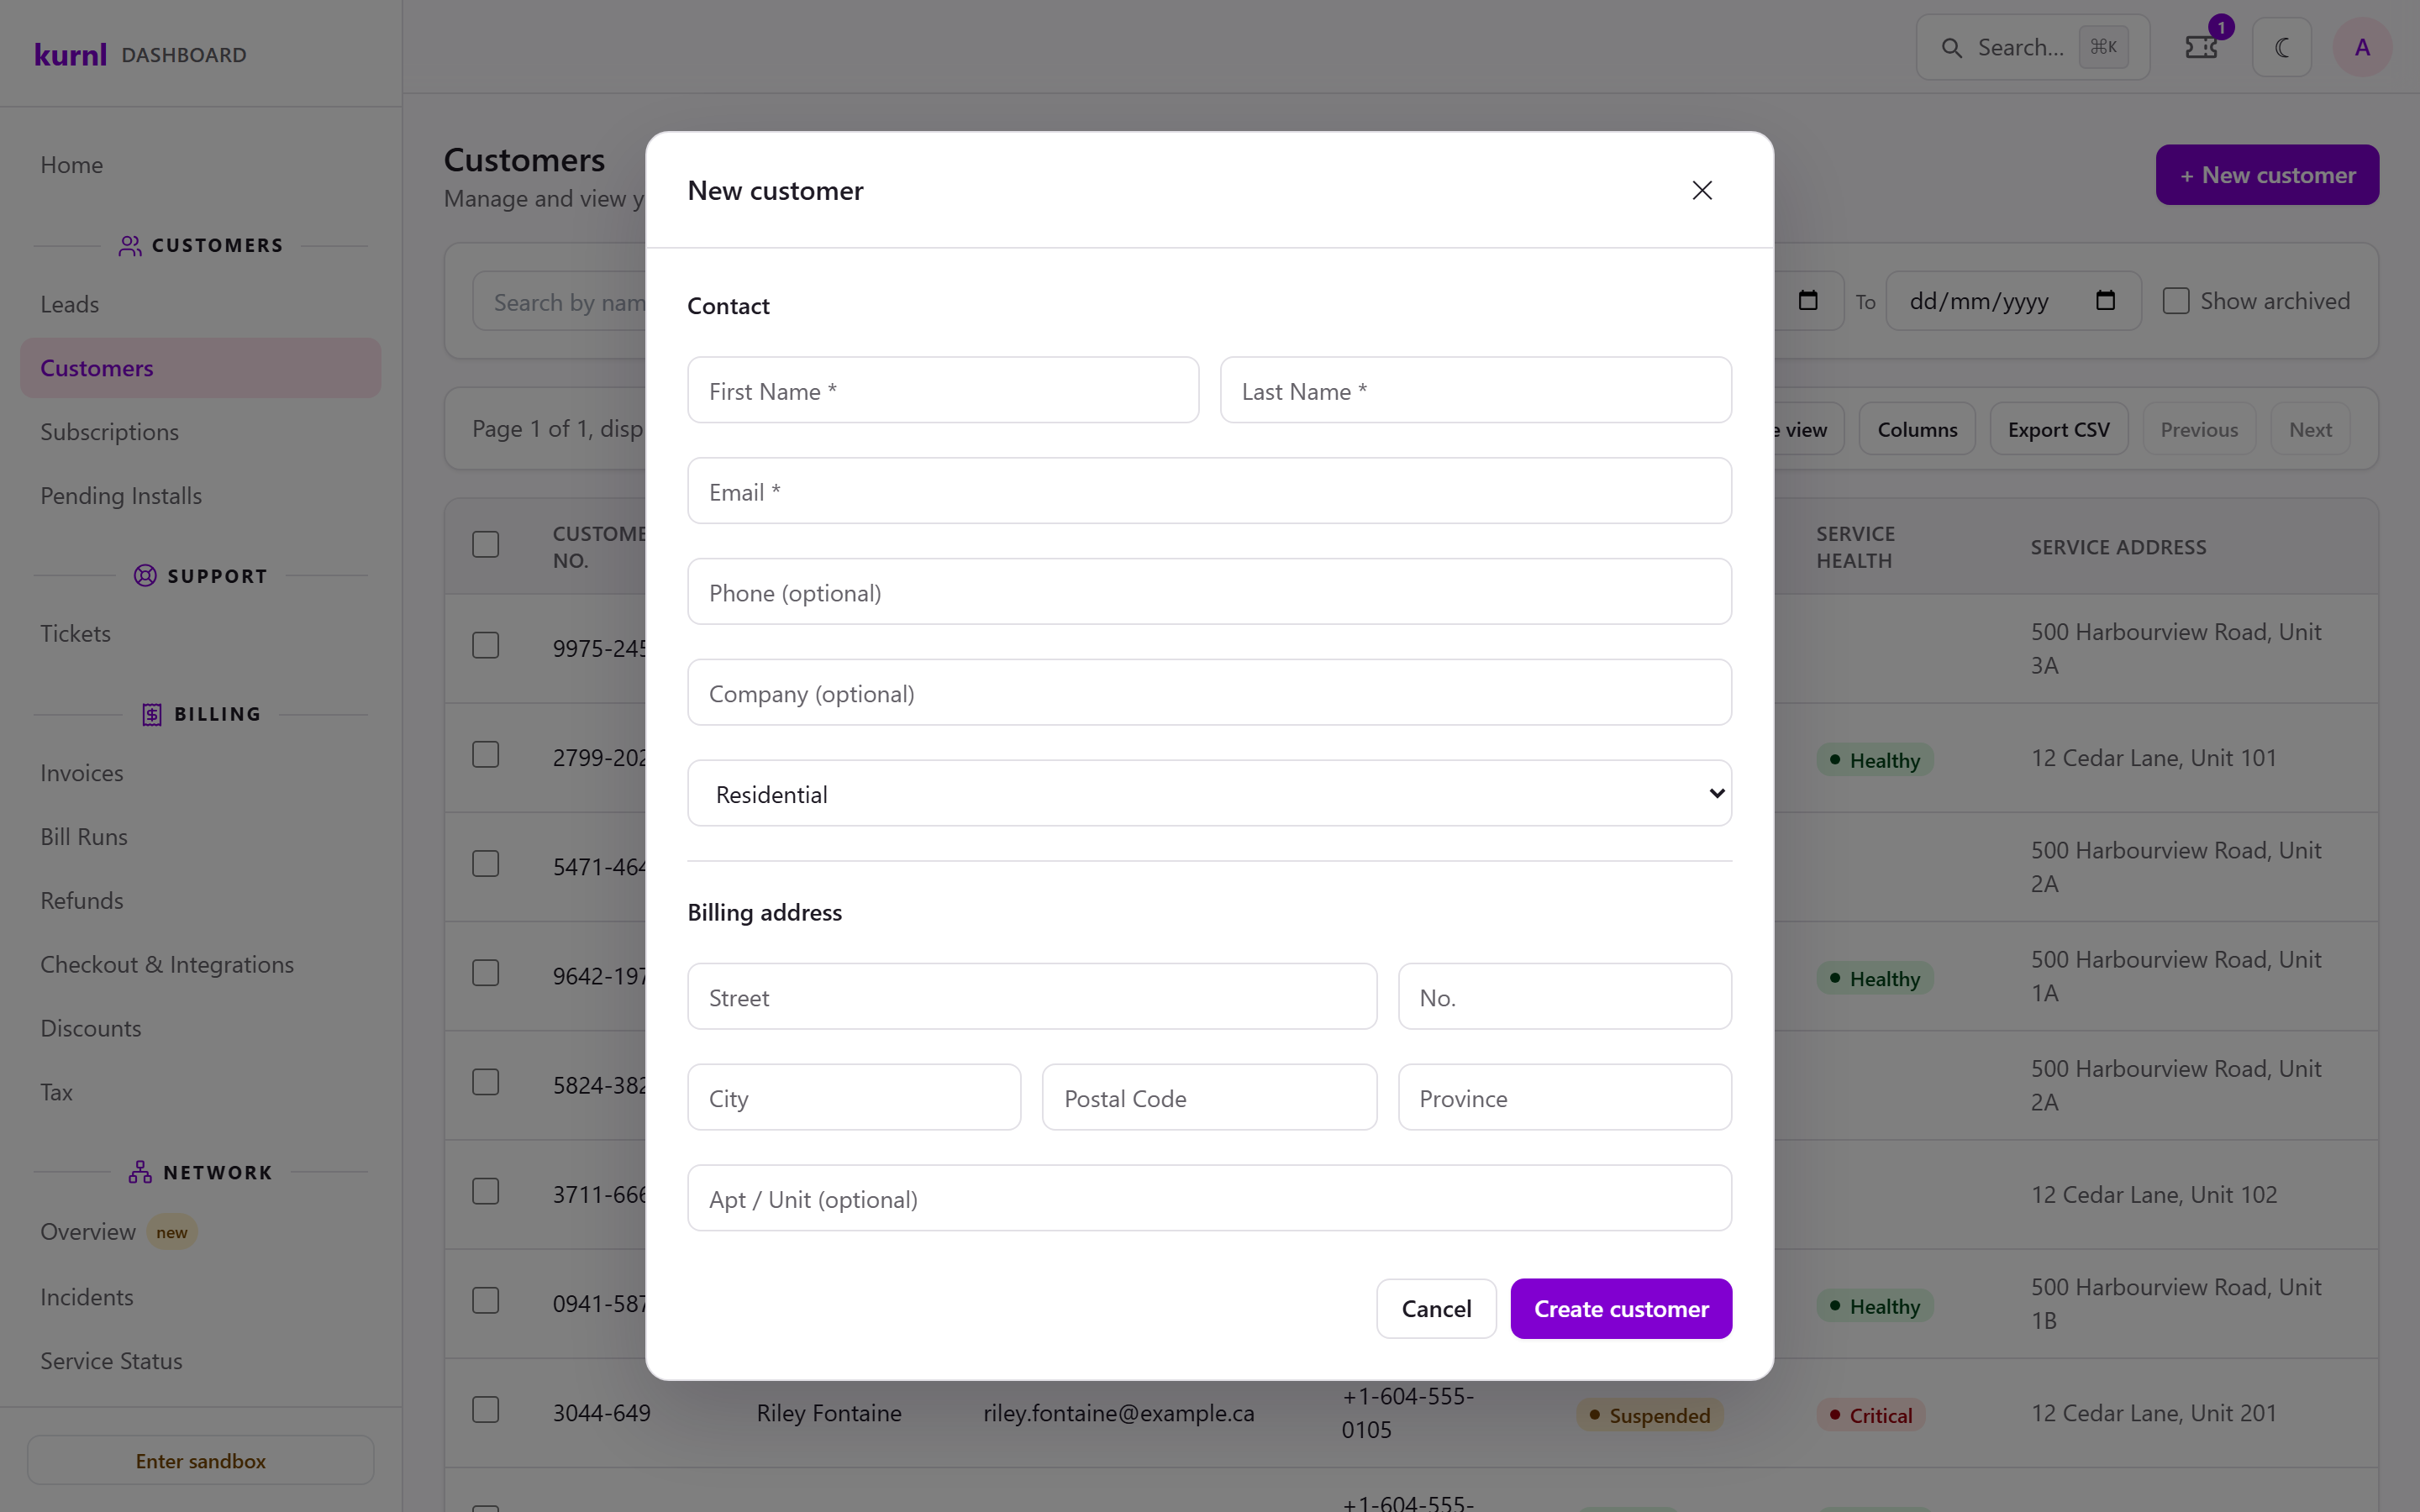
Go to Customers → Customers and press + New customer.
The customer list with + New customer
2
Enter the contact and invoice address
Under Contact: first and last name, e-mail, and optionally phone and
company; choose Residential or Business. Under Invoice address:
the address invoices go to.
3
Create
Press Create customer. The customer page opens; the customer gets a
customer number.
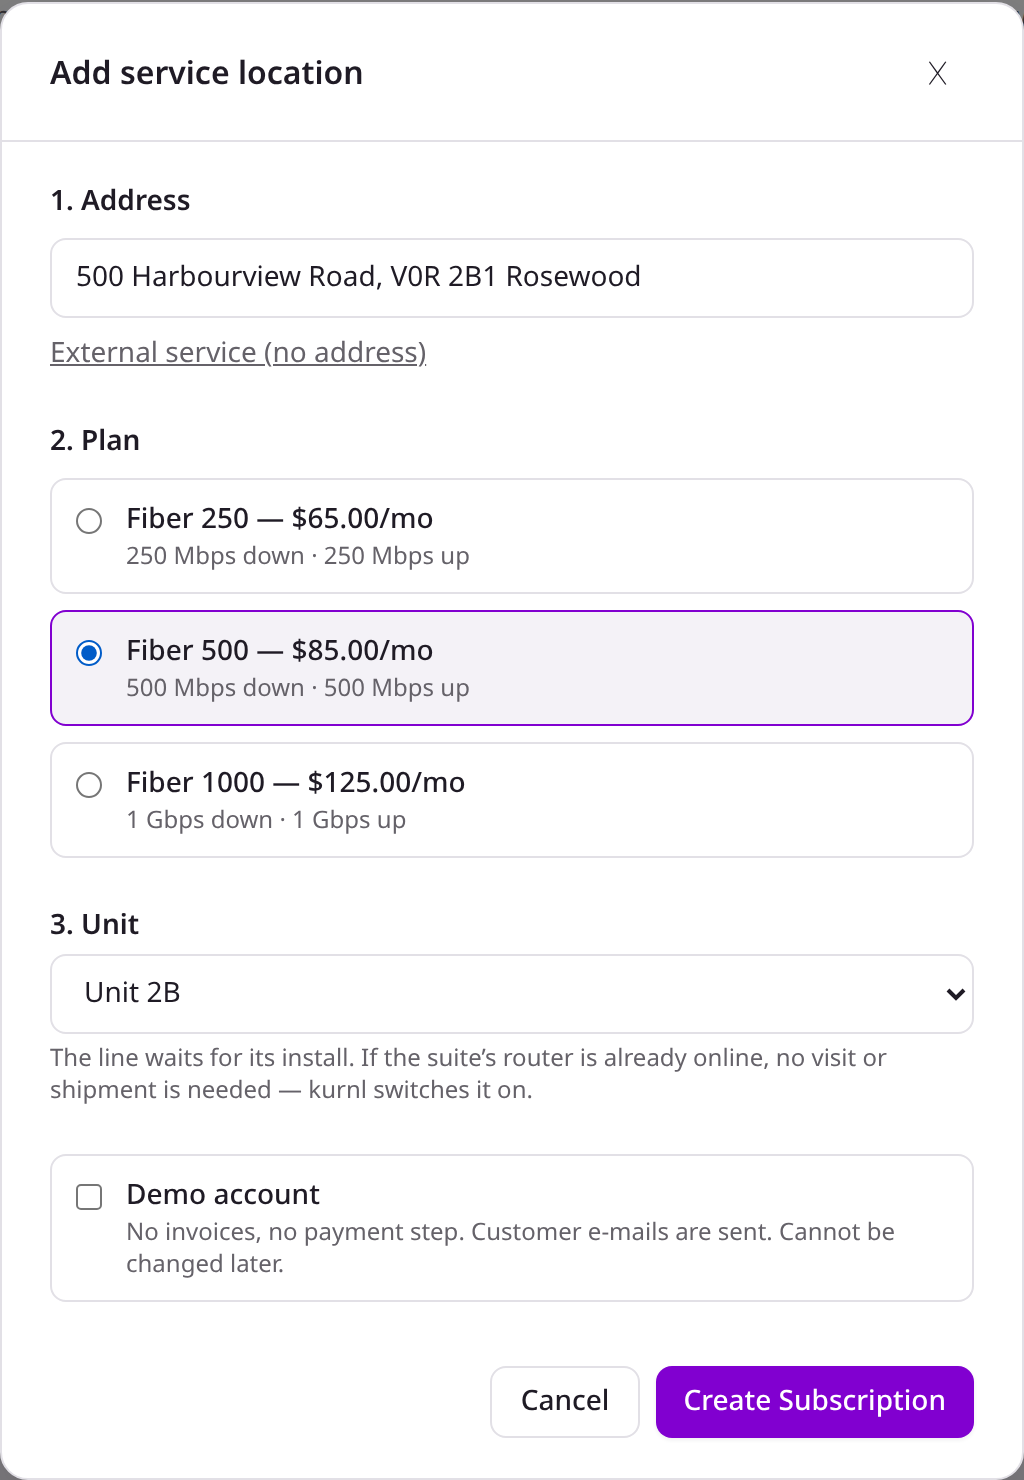
On the customer’s Services tab, press + Add location.
2
Find the address
Under 1. Address, type the building’s street and number. Suggestions
appear after three characters. A building that takes pre-orders shows
Pre-orders · service from a date; a building you cannot order for yet
shows Not orderable yet. Pick the building from the list.
3
Pick the plan
Under 2. Plan, choose one of your plans that is offered in that
building. The price shown is the campaign price, with the list price and
how long the campaign runs underneath. In a building where the internet is
part of the rent, the note Internet is included in the rent at this
building. appears, and a bulk plan carries an Included badge. For an off-net service, press External service (no
address) instead — see
External (off-net) subscriptions.
4
Pick the unit
Under 3. Unit, choose a free unit in the building. Only units without a
service are offered; if there is none, the form says No free unit in this
building. A network plan needs a unit: Create Subscription stays
disabled until one is picked.
5
Demo account (admins only)
If you are a provider admin, or kurnl staff, you also see a Demo
account switch, for external services as well. Leave it off for a real
customer — see Demo customers.
Use a demo account to show kurnl to a prospect, train staff or test a
building end to end with a real line. Only provider admins and kurnl staff see
the Demo account switch under the unit; support users do not. The switch
reads: No invoices, no payment step. Customer e-mails are sent. Cannot be
changed later.A demo line:
goes live when the technician completes the visit, or when the install is
confirmed, without a payment method on file;
never gets an invoice: no first invoice, no recurring invoice, no payment
link, no fees, no corrections and no final invoice;
sends the customer e-mails as any other line does;
cannot be moved to another provider.
The switch can only be set when the line is created, and it can never be
turned off. A demo customer who becomes a paying customer needs a new
subscription. A Demo badge marks the line in the customer list, in the
customer’s header and on the line itself.
An anonymous line belongs to a partner who bills the end customer
themselves: kurnl knows the unit, not the person.
Go to Customers → Subscriptions and press + Anonymous.
Choose the Plan and a free Unit (plans faster than the unit’s
building delivers are greyed out), optionally a Partner Reference
and a Contact e-mail (where kurnl sends the Wi-Fi set-up link, and the
booking mail if the building needs a booked visit).
Press Create Anonymous Subscription. The line appears in Pending
Installs.
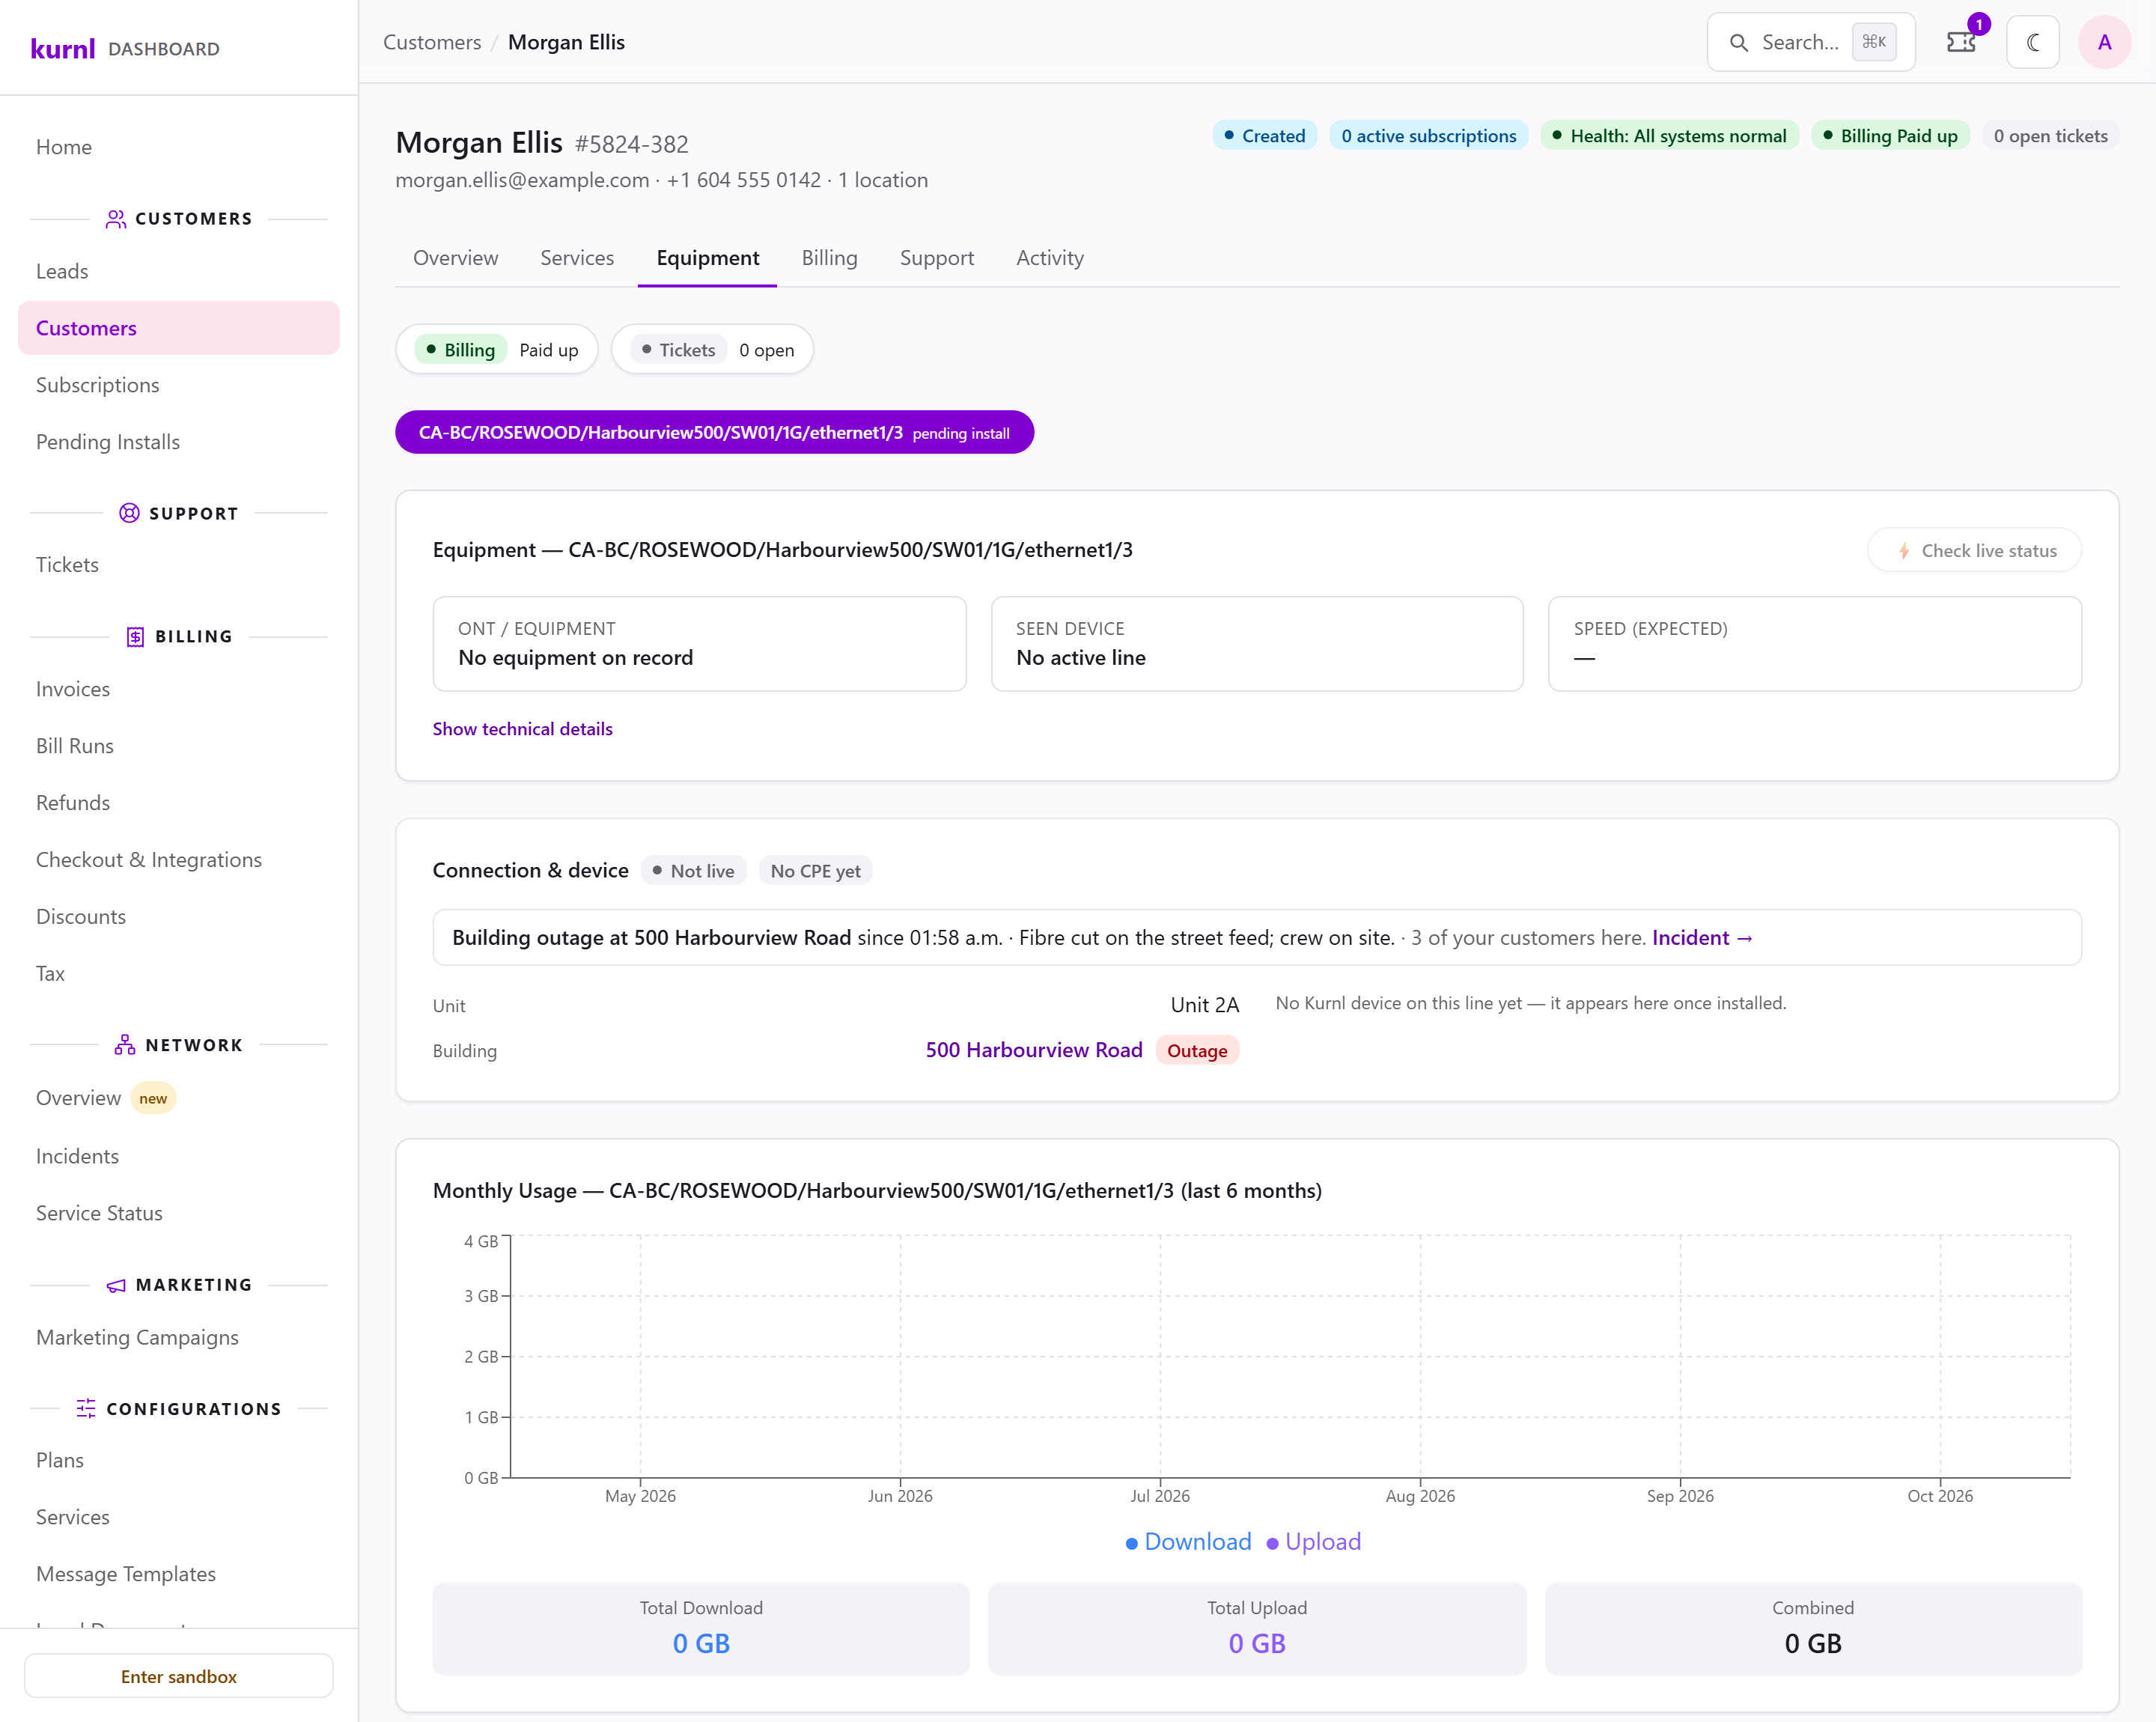
Open an anonymous line from Customers → Subscriptions (the search finds it by
contact e-mail or partner reference). Its page works like a customer’s
Equipment tab, for a line with no customer behind it:
A health strip and Connection & device show the line state, the router,
the speed and the resident network. There is
no Run service check: the section re-reads itself every 45 seconds while
the line is down or the router offline. A line that is not installed yet shows
its install card instead, and a line with no port yet is not an error.
Reboot is on the router’s device page (Open device), and Retry
provisioning on the install card; both are there for roles that may change
customers, and sales can read the page but not use them.
A Connection path card further down the page reads This line → Unit ONT → Building switch → Building →
Kurnl network → Internet for roles that can read the network. A line without
an on-net connection says so.
Visits lists the line’s technician visits, for roles that can read field
work.
Tickets lists the tickets about the line. Roles with ticket access open
them and press + New ticket; for sales the titles are plain text.
Show closed switches the list to the 20 most recently closed tickets.
Usage appears once the line has been live.
There is no billing block: the partner bills the end customer. A router’s page
leads back with Back to the line.
An anonymous line cannot switch provider: there is no customer record to move.
Cancel it, and the new provider orders a new line. The switch options show it as
not eligible, and a plan change to another provider’s plan is refused with
that same message.
An anonymous line has no customer portal, so its household sets the Wi-Fi on a
page a mail link opens. kurnl sends that mail once, to the line’s contact
e-mail, when the router first makes contact (or when the line goes live).On the line’s page, two buttons are there for the rest:
Send Wi-Fi link mails a new link. It works once, for 7 days, and replaces
the earlier unused one. At most five links go out per line in 24 hours.
Set Wi-Fi opens a dialog for the network name and password. Generate
makes a password. After you save, the password is shown once — copy it then.
kurnl does not show it again.
The calls fail without a kurnl router on the line, and the link also without a
contact e-mail. Platform administrators do not see them. Your partner can do the same
through the API.